NHTSA Campaign Number: 16V253
Component(s): ELECTRICAL SYSTEM , EXTERIOR LIGHTING
Potential Number of Units Affected: 6,422
Manufacturer: Chrysler![]() (FCA US LLC)
(FCA US LLC)
SUMMARY:
Chrysler![]() (FCA US LLC) is recalling certain model year 2014-2016 RAM
(FCA US LLC) is recalling certain model year 2014-2016 RAM![]() ProMaster vehicles manufactured July 24, 2015, to February 15, 2016, and 2015-2016 ProMaster City vehicles manufactured August 15, 2014, to February 1, 2016.
ProMaster vehicles manufactured July 24, 2015, to February 15, 2016, and 2015-2016 ProMaster City vehicles manufactured August 15, 2014, to February 1, 2016.
The Trailer Tow Lighting Control Module may have a software error on the affected vehicles and can prevent illumination of the trailer brake lights during brake actuation.
As such, these vehicles fail to comply with the requirements of Federal Motor Vehicle Safety Standard (FMVSS) number 108, “Lamps, Reflective Devices, and Assoc. Equipment.”
CONSEQUENCE:
Trailer brake lights that are inoperative can increase the risk of a crash.
REMEDY:
Chrysler![]() will notify owners, and dealers will replace the Trailer Tow Light Control Module, free of charge.
will notify owners, and dealers will replace the Trailer Tow Light Control Module, free of charge.
The recall began on June 20, 2016.
Owners may contact Chrysler![]() customer service at 1-800-853-1403.
customer service at 1-800-853-1403.
Chrysler![]() ’s number for this recall is S22.
’s number for this recall is S22.
NOTES:
Owners may also contact the National Highway Traffic Safety Administration Vehicle Safety Hotline at 1-888-327-4236 (TTY 1-800-424-9153), or go to www.safercar.gov.
Check if your Vehicle has a Recall
Revision II June 2016
Dealer Service Instructions for:
Safety Recall S22 / NHTSA 16V-253 Trailer Tow Lighting Control Module
NOTE: Additional information added to the parts section.
Models
NOTE: This recall applies only to the above vehicles equipped with Trailer Tow Group (sales code AHT) built from September 03, 2014 through February 15, 2016 (MDH 090317 through 021517).
IMPORTANT: Many of the vehicles within the above build period have already been inspected or repaired and, therefore, have been excluded from this recall.
| IMPORTANT: Some of the involved vehicles may be in dealer new vehicle inventory. Federal law requires you to complete this recall service on these vehicles before retail delivery. Dealers should also consider this requirement to apply to used vehicle inventory and should perform this recall on vehicles in for service. Involved vehicles can be determined by using the VIP inquiry process. |
Subject
The trailer tow lighting control module on about 1,400 of the above vehicles may have a software error causing inoperative trailer brake lights. Towing a trailer with inoperative brake lights could cause a crash.
The condition above fails to conform to the requirements of Federal Motor Vehicle Safety Standard (FMVSS) No. 571 – Lamps, Reflective Devices, and Associated Equipment.
Repair
Replace the trailer tow lighting control module.
Alternate Transportation
Dealers should attempt to minimize customer inconvenience by placing the owner in a loaner vehicle if the vehicle must be held overnight.
Parts Information
| Part Number | Description |
|---|---|
| CBAAS221AA | Module, Trailer Tow Lighting Control. |
| 06106929AA | Screw, 1/4 Hex (VF) as required. |
| 06106554AA | Screw, M4x1.79×25.00 (VM) as required. |
NOTE: It is expected that less than 1,450 vehicles will require replacement of the Trailer Tow Lighting Control Module. Dealers should NOT order this module CBAAS221AA unless the vehicle is known to be equipped with Trailer Tow Group (sales code AHT). This module is non-returnable. Dealers should only order the module for each vehicle at the time the appointment is scheduled.
Parts Return
No parts return required for this campaign.
Special Tools
The following special tools are required to perform this repair:
| wiTECH micro pod II |
| Laptop Computer |
| wiTECH Software |
Service Procedure
A. (VF) RAM Promaster
- Disconnect the negative battery cable terminal from the battery.
- Open the rear cargo doors (Figure 1).
- Remove and save the seven screws and the quarter trim panel from the left rear corner (Figure 1).
- Disconnect the electrical connector from the trailer tow lighting control module (Figure 2).
- Twist / rotate the trailer tow lighting control module both clockwise and counterclockwise to separate the foam adhesive patch securing the module. A plastic non-marring trim stick or equivalent may also be used to assist with module removal. Remove and discard the trailer tow lighting control module (Figure 2).

Figure 1 – Quarter Trim Panel

Figure 2 – Trailer Tow Lighting Control Module
- Remove any large adhesive foam backing pieces using a plastic scratch resistant tool such as a trim stick or equivalent (Figure 3).
- Use a clean rag and isopropyl alcohol to remove any residual adhesive from the module mounting area (Figure 4). Allow 60 seconds to dry before installing the new module.
- Remove the paper liner from the foam adhesive patch on the new trailer tow lighting control module (Figure 5).

Figure 3 – Remove Foam Pieces

Figure 4 – Remove Residual Adhesive

Figure 5 – Remove Paper Liner
- Place the new trailer tow lighting control module in the in the same location as the old module (Figure 6).
- Press and hold the new trailer tow lighting control module in place applying constant pressure to for 30 seconds to ensure proper adhesion of the foam patch to the vehicle (Figure 6).
- Connect the electrical connector to the trailer tow lighting control module (Figure 7).
- Install the quarter trim panel and seven screws (Figure 1).
- Close the rear cargo doors (Figure 1).
- Connect the negative battery cable terminal to the battery.
- Connect the wiTECH scan tool and clear all Diagnostic Trouble Codes (DTCs).
- Disconnect the wiTECH scan tool from the vehicle.

Figure 6 – Press And Hold New Module

Figure 7 – Connect Electrical Connector
- Verify the rear vehicle lighting functions properly.
- Return the vehicle to the customer.
B. (VM) RAM ProMaster City
- Disconnect the negative battery cable terminal from the battery.
- Open the rear cargo doors, open the left rear sliding door and if equipped, fold the rear seat forward.
- Lift up the left C-pillar seat belt upper anchor bolt cover (Figure 8).

Figure 8 – C-Pillar Seat Belt Upper Anchor
- Remove the left C-pillar seat belt upper anchor bolt (Figure 8).
- Ensure the black spacer remains on the seat belt anchor bolt (Figure 9).

Figure 9 – Seat Belt Anchor Spacer
- Remove and save the cover from the left C-pillar lower seat belt anchor bolt (Figure 10).
- Remove and save the left C-pillar lower seat belt anchor bolt (Figure 10).
- Remove and save the trim cover from the top of the left C-pillar trim (Figure 11).
- Remove and save the two screws from the top of the left C-pillar trim (Figure 11).
- Remove and save the left C-pillar trim (Figure 11).
- Remove and save the door sill scuff plate from the left rear sliding side door opening (Figure 12).

Figure 10 – C-Pillar Seat Belt Lower Anchor

Figure 11 – C-Pillar Trim

Figure 12 – Door Sill Scuff Plate
- Remove and save the two screws from the left rear quarter trim panel bin storage tray (Figure 13).
- Remove and save the left rear quarter trim panel bin storage tray. Ensure the nine retaining clips remain on the storage tray during removal. Reinstall any missing clips (Figure 13).

Figure 13 – Bin Storage Tray
- Remove and save the two screws securing the speaker to the left rear quarter trim panel (Figure 14).
- Disconnect the electrical connector from the speaker then remove and save the speaker (Figure 14).

Figure 14 – Speaker
- Reach in behind the left rear quarter trim panel to release the interior lamp housing from the quarter trim panel (Figure 15).
- Disconnect the electrical connector from the interior lamp then remove and save the interior lamp (Figure 15).

Figure 15 – Interior Lamp
- Reach in behind the left rear quarter trim panel to disconnect the electrical connector from the green 12V outlet (Figure 16).

Figure 16 – 12V Outlet
- Remove and save seven screws from the left rear quarter trim panel (Figure 17).
- Remove and save the left rear quarter trim panel while routing the seatbelt webbing through the slot in the trim panel (Figure 17).

Figure 17 – Quarter Trim Panel
- Disconnect the electrical connector from the trailer tow lighting control module (Figure 18).
- Using a grease pencil or equivalent, mark the module location (Figure 19).
CAUTION: The module is mounted on the back side of a visible exterior body panel. Do NOT use tools of any type for prying the module. Use of tools may cause damage to the exterior appearance of the vehicle.
- Use hands ONLY to twist / rotate the trailer tow lighting control module both clockwise and counterclockwise to separate the foam adhesive patch securing the module to the body panel. Remove and discard the trailer tow lighting control module (Figure 20).

Figure 18 – Module Electrical Connector

Figure 19 – Mark Module Location

Figure 20 – Twist / Rotate Module To Release
- Use fingers ONLY to rub away any large adhesive foam backing pieces (Figure 21).
CAUTION: Do NOT use tools of any type for foam removal. Use of tools may cause damage to the exterior appearance of the vehicle.
- Use a clean rag and isopropyl alcohol to remove any residual adhesive from the module mounting area (Figure 22). Allow 60 seconds to dry before installing the new module.
- Remove the paper liner from the foam adhesive patch on the new trailer tow lighting control module (Figure 23).

Figure 21 – Remove Foam Pieces

Figure 22 – Remove Residual Adhesive

Figure 23 – Remove Paper Liner
- Place the new trailer tow lighting control module in the previously marked location (Figure 24).
- Press and hold the new trailer tow lighting control module in place applying constant pressure to for 30 seconds to ensure proper adhesion of the foam patch to the vehicle (Figure 24).
- Connect the electrical connector to the trailer tow lighting control module (Figure 25).

Figure 24 – Press And Hold New Module

Figure 25 – Connect Electrical Connector
- Route the seatbelt webbing through the slot in the left rear quarter trim panel then install the trim panel (Figure 17).
NOTE: Ensure the body door opening seals at forward and rearward edges of the left rear quarter trim panel properly overlay the trim panel.
- Install the seven screws securing the left rear quarter trim panel (Figure 17).
- Reach in behind the left rear quarter trim to connect the electrical connector to the green 12V outlet (Figure 16).
- Connect the electrical connector to the interior lamp then install the interior lamp housing to the left rear quarter trim panel (Figure 15).
- Connect the electrical connector to the speaker then install the speaker to the left rear quarter trim panel (Figure 14).
- Install the two screws securing the speaker to the left rear quarter trim panel (Figure 14).
- Install the bin storage tray to the left rear quarter trim panel. Ensure that all nine retaining clips are installed on the storage tray before installation. Reinstall any missing clips (Figure 13).
- Install the two screws securing the bin storage tray to the left rear quarter trim panel (Figure 13).
- Install the door sill scuff plate to the left rear sliding door opening (Figure 12).
- Install the left C-pillar trim (Figure 11).
- Install the two screws to the left C-pillar trim (Figure 11).
- Install the trim cover at the top of the left C-pillar trim (Figure 11).
- Ensure the seatbelt webbing is properly aligned and then install the left C-pillar lower seat belt anchor bolt (Figure 10). Tighten the bolt to 30 ft. lbs. (40 N·m).
- Install the cover on the left C-pillar lower seat belt anchor bolt (Figure 10).
- Ensure the black spacer is on the left C-pillar upper seat belt anchor bolt (Figure 9).
- Ensure the seatbelt webbing is properly aligned and then install the left C-pillar upper seat belt anchor bolt (Figure 8). Tighten the bolt to 30 ft. lbs. (40 N·m).
- Close and secure the left C-pillar upper seat belt anchor bolt cover (Figure 8).
- If equipped, place the rear seat in the customer preferred position as it was prior to service.
- Close the left rear sliding door and rear cargo doors.
- Connect the negative battery cable terminal to the battery.
- Connect the wiTECH scan tool and clear all Diagnostic Trouble Codes (DTCs).
- Disconnect the wiTECH scan tool from the vehicle.
- Verify the rear vehicle lighting functions properly.
- Return the vehicle to the customer.
Completion Reporting and Reimbursement
Claims for vehicles that have been serviced must be submitted on the DealerCONNECT Claim Entry Screen located on the Service tab. Claims submitted will be used by FCA to record recall service completions and provide dealer payments.
Use one of the following labor operation numbers and time allowances:
| Labor Operation Number | Time Allowance | |
|---|---|---|
| Replace Module (VF) ProMaster | 08-S2-21-82 | 0.4 hours |
| Replace Module (VM) ProMaster City | 08-S2-21-82 | 0.7 hours |
NOTE: See the Warranty Administration Manual, Recall Claim Processing Section, for complete recall claim processing instructions.
Dealer Notification
To view this notification on DealerCONNECT, select “Global Recall System” on the Service tab, then click on the description of this notification.
Owner Notification and Service Scheduling
All involved vehicle owners known to FCA are being notified of the service requirement by first class mail. They are requested to schedule appointments for this service with their dealers. A generic copy of the owner letter is attached.
Enclosed with each owner letter is an Owner Notification postcard to allow owners to update our records if applicable.
Vehicle Lists, Global Recall System, VIP and Dealer Follow Up
All involved vehicles have been entered into the DealerCONNECT Global Recall System (GRS) and Vehicle Information Plus (VIP) for dealer inquiry as needed.
GRS provides involved dealers with an updated VIN list of their incomplete vehicles. The owner’s name, address and phone number are listed if known. Completed vehicles are removed from GRS within several days of repair claim submission.
To use this system, click on the “Service” tab and then click on “Global Recall System.” Your dealer’s VIN list for each recall displayed can be sorted by: those vehicles that were unsold at recall launch, those with a phone number, city, zip code, or VIN sequence.
Dealers must perform this repair on all unsold vehicles before retail delivery. Dealers should also use the VIN list to follow up with all owners to schedule appointments for this repair.
Recall VIN lists may contain confidential, restricted owner name and address information that was obtained from the Department of Motor Vehicles of various states. Use of this information is permitted for this recall only and is strictly prohibited from all other use.
Additional Information
If you have any questions or need assistance in completing this action, please contact your Service and Parts District Manager.
Customer Services / Field Operations
FCA US LLC
TRAILER TOW LIGHTING CONTROL MODULE
IMPORTANT SAFETY RECALL
S22 / NHTSA 16V-253
This notice applies to your vehicle (VIN: xxxxxxxxxxxxxxxxx).
This notice is sent to you in accordance with the requirements of the National Traffic and Motor Vehicle Safety Act.
Dear: (Name)
FCA has decided that certain 2014 through 2016 model year RAM![]() ProMaster and 2015 and 2016 model year RAM
ProMaster and 2015 and 2016 model year RAM![]() ProMaster City vehicles equipped with Trailer Tow Group fail to conform to Federal Motor Vehicle Safety Standard (FMVSS) No. 571.108 – Lamps, Reflective Devices, and Associated Equipment.
ProMaster City vehicles equipped with Trailer Tow Group fail to conform to Federal Motor Vehicle Safety Standard (FMVSS) No. 571.108 – Lamps, Reflective Devices, and Associated Equipment.
| The problem is… | The trailer tow lamp module on your vehicle may malfunction due to a software error. This could result in inoperative trailer brake lights. Towing a trailer with inoperative brake lights could cause a crash. |
| What your dealer will do… | FCA will repair your vehicle free of charge. To do this, your dealer will replace the trail tow lamp module. The work will take about 1½ hours to complete. However, additional time may be necessary depending on service schedules. |
| What you must do to ensure your safety… | For ProMaster vehicles, contact your Authorized BusinessLINK dealer right away to schedule a service appointment. For ProMaster City vehicles, contact your Authorized BusinessLINK, Chrysler |
| If you need help… | If you have questions or concerns which your dealer is unable to resolve, please contact the FCA Group Recall Assistance Center at either recalls.mopar.com or 1-800-853-1403. |
Please help us update our records by filling out the attached prepaid postcard if any of the conditions listed on the card apply to you or your vehicle. If you have further questions go to recalls.mopar.com.
If you have already experienced this specific condition and have paid to have it repaired, you may mail your original receipts and proof of payment to the following address for reimbursement consideration: FCA Customer Assistance, P.O. Box 21-8004, Auburn Hills, MI 48321-8007, Attention: Recall Reimbursement. Once we receive and verify the required documents, reimbursement will be sent to you within 60 days. If you’ve had previous repairs and/or reimbursement you may still need to have the recall repair performed on your vehicle.
If your dealer fails or is unable to remedy this defect without charge and within a reasonable time, you may submit a written complaint to the Administrator, National Highway Traffic Safety Administration, 1200 New Jersey Ave., S.E., Washington, DC 20590, or call the toll-free Vehicle Safety Hotline at 1-888-327-4236 (TTY 1-800-424-9153), or go to https://www.safercar.gov.
We’re sorry for any inconvenience, but we are sincerely concerned about your safety. Thank you for your attention to this important matter.
Customer Services / Field Operations
FCA US LLC
Note to lessors receiving this recall: Federal regulation requires that you forward this recall notice to the lessee within 10 days.

- VERSATILE: Compatible with a wide range of vehicles including Ford, GM, Chevy, Dodge
 , RAM, Toyota, Jeep, and more with 2, 4, 6, and 8 brakes (1-4 axles). Tekonsha Plug & Play brake controller wiring harness sold separately.
 - PROPORTIONAL ELECTRIC BRAKE CONTROLLER: Provides automatic braking based on the intensity and rate at which you apply your tow vehicle’s brakes, thanks to an internal inertia sensor.
- EASY-TO-READ LCD DISPLAY: Front-facing color LCD display shows settings, real-time diagnostics, and alerts
- STORE SETTING OPTIONS: The Prodigy P3 trailer brake controller can store up to five different trailer or driver preferences, making it the ideal choice for those who use the same tow vehicle to pull multiple trailers.
- BOOST FEATURE PROVIDES EXTRA BRAKING POWER: Boost provides up to three levels of additional stopping power at the touch of a button, giving you confidence in stopping safely when you’re hauling heavier loads and/or need more power to stop.
Last update on 2026-06-19 / Affiliate links / Images from Amazon Product Advertising API

- PROPORTIONAL ELECTRIC BRAKE CONTROLLER: Provides automatic braking based on the intensity and rate at which you apply your tow vehicle’s brakes, giving you smooth braking thanks to an internal inertia sensor. This makes the Primus IQ brake controller ideal for general and heavy-duty emergency braking.
- EASILY INSTALL AND STOW, THANKS TO PLUG & PLAY: The Primus IQ trailer brake controller has a snap-in dash mounting clip, Plug & Play port for two plug adapters, and removeable electrical connector so the unit can be easily unplugged, unclipped, and stored.
- EASY-TO-READ LED DISPLAY: Digital LED display shows settings, real-time diagnostics, and alerts.
- BOOST FEATURE PROVIDES EXTRA BRAKING POWER: Boost provides up to three levels of additional stopping power at the touch of a button, giving you confidence in stopping safely when you’re hauling heavier loads and/or need more power to stop.
- VERSATILE: The Primus IQ electric brake controller is compatible with a wide range of vehicles including Ford, GM, Chevy, Dodge, RAM, Toyota, Jeep, and more with 2, 4, or 6
Last update on 2026-06-19 / Affiliate links / Images from Amazon Product Advertising API
 Brake Control" title="Safety Recall S22 / NHTSA 16V-253 Trailer Tow Lighting Control Module - 2014-2016 RAM ProMaster & 2015-2016 ProMaster City 28">
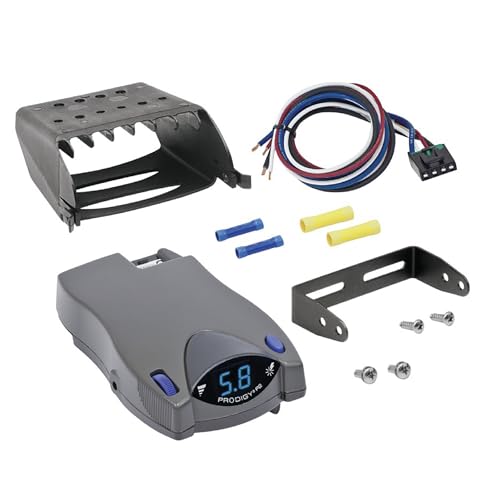
- PROPORTIONAL ELECTRIC BRAKE CONTROLLER: Provides automatic braking based on the intensity and rate at which you apply your tow vehicle’s brakes, thanks to an internal inertia sensor. This makes the Tekonsha P2 brake controller ideal in any braking situation
- EASILY INSTALL AND STOW, THANKS TO PLUG & PLAY: The Primus IQ trailer brake controller has a snap-in dash mounting clip, Plug & Play port for two plug adapters, and removeable electrical connector so the unit can be easily unplugged, unclipped, and stored
- EASY-TO-READ LED DISPLAY: Color LED display shows settings, real-time diagnostics, and alerts
- BOOST FEATURE PROVIDES EXTRA BRAKING POWER: Boost provides up to three levels of additional stopping power at the touch of a button, giving you confidence in stopping safely when you’re hauling heavier loads and/or need more power to stop
- VERSATILE: The Prodigy P2 electric brake controller is compatible with a wide range of vehicles including Ford, GM, Chevy, Dodge, RAM, Toyota, Jeep, and more with 2, 4, 6, and 8 brakes (1-4 axles). Vehicle-specific Tekonsha Plug & Play brake controller wiring harness sold separately
Last update on 2026-06-19 / Affiliate links / Images from Amazon Product Advertising API
This product presentation was made with AAWP plugin.