| “This site contains affiliate links for which OEMDTC may be compensated” |
NUMBER: 05-001-17 REV. A
GROUP: Brakes
DATE: January 14, 2017
THIS BULLETIN SUPERSEDES SERVICE BULLETIN 05-001-17, DATED JANUARY 12, 2017, WHICH SHOULD BE REMOVED FROM YOUR FILES. ALL REVISIONS ARE HIGHLIGHTED WITH **ASTERISKS** AND INCLUDE 2017 VEHICLES.
SUBJECT:
Front Brake Squeak/Squeal Noise
OVERVIEW:
This bulletin involves cleaning excessive sealant from the front brake caliper adaptor brackets and replacing the adaptor bracket mounting bolts and/or replacing the front brake pads and related hardware.
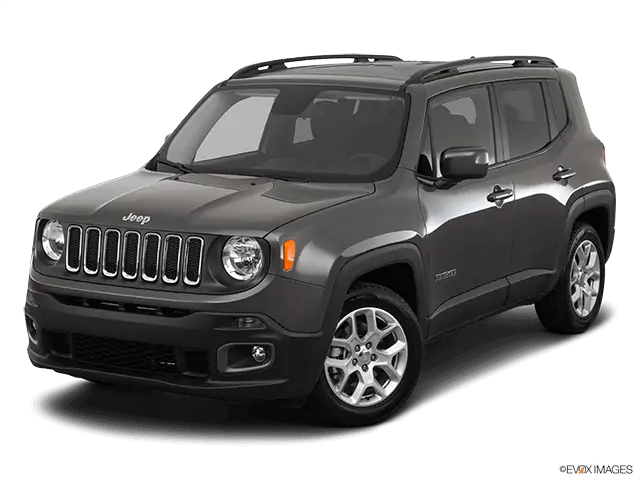
MODELS:
NOTE: This bulletin applies to vehicles within the following markets/countries: NAFTA
NOTE: This bulletin applies to vehicles built on or before November 11, 2016 (MDH 1111XX).
SYMPTOM/CONDITION:
The customer may describe one or more of the front brake squeak/squeal noise symptoms/conditions:
- Squeak/squeal noise during moderate brake apply combined with light steering. The noise typically occurs with warm brakes after several brake applications.
- Squeak/squeal noise during low speed brake apply with vehicle moving forward or reverse. The noise typically only occurs after the vehicle sits overnight in colder ambient temperatures and the noise will go away after a few brake applications.
DIAGNOSIS:
If the customer describes the symptom/condition listed above, perform the Repair Procedure.
PARTS REQUIRED:
| Qty. | Part No. | Description |
| 1 | 68353886AA | PAD KIT, Front Disc Brake, Includes Hardware |
| 4 (AR) | 68300566AA | BOLT, Hex Flange Head, M14X1.50X30.00 (Minimum Sales Quantity 4 Bolts) Only required for vehicles built on or before February 25, 2015. |
REPAIR PROCEDURE:
- Lift and support the vehicle. Refer to the detailed service procedures available in DealerCONNECT> TechCONNECT under: Service Info> 04 – Vehicle Quick Reference> Hoisting> Standard Procedure.
- Remove the front wheels. Refer to the detailed service procedures available in DealerCONNECT> TechCONNECT under: Service Info> 22 – Tires and Wheels> Removal and Installation.
NOTE: Perform this procedure on both right and left side of the vehicle.
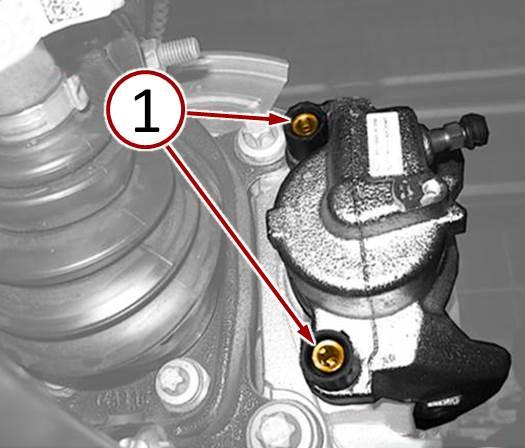
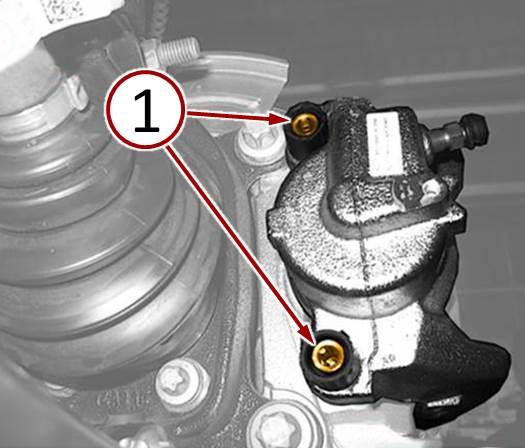
- Loosen the brake caliper mounting guide pin bolts (Fig. 1).
Fig. 1 Loosen Brake Caliper Guide Pin Bolts
1 – Guide Pin Bolts
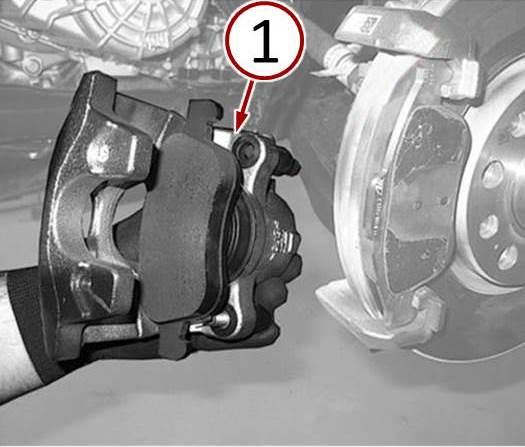
CAUTION: Support the brake caliper to prevent brake hose damage. Do NOT allow the brake caliper to hang from the brake hose.
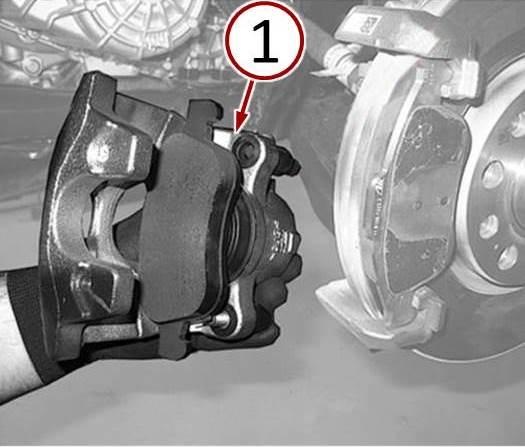
- Remove the brake caliper from the brake caliper adaptor and support the brake caliper in order to prevent damage to the brake hose (Fig. 2).
Fig. 2 Remove And Support Brake Caliper
1 – Brake Caliper
- Remove and discard the front brake pads.
NOTE: Step #7 through Step #16 applies to vehicles built on or before February 25, 2015 (MDH 0225XX).
- Was vehicle built on or before February 25, 2015?
- YES>>> Continue with Step #7.
- NO>>> Proceed to Step #17.
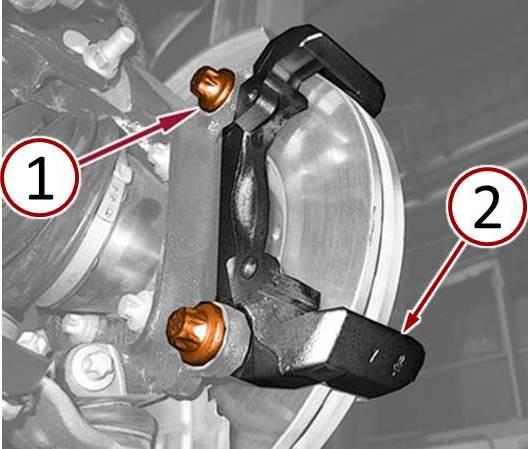
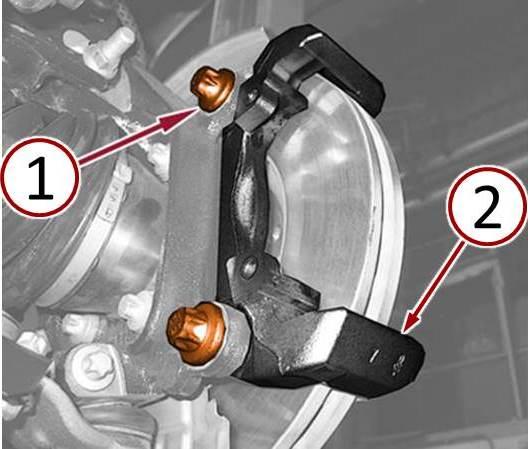
- Remove the brake caliper adaptor to front steering knuckle bolts (Fig. 3).
- Remove the brake caliper adaptor bracket (Fig. 3).
Fig. 3 Remove Brake Caliper Adaptor Bracket
1 – Brake Caliper Adaptor Bolts
2 – Brake Caliper Adaptor Bracket
- Mark the position of the brake rotor before removal.
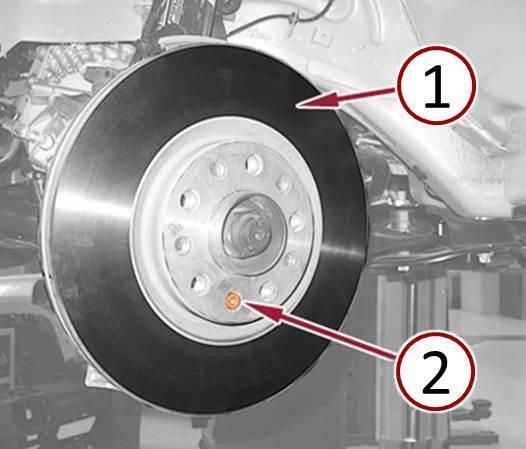
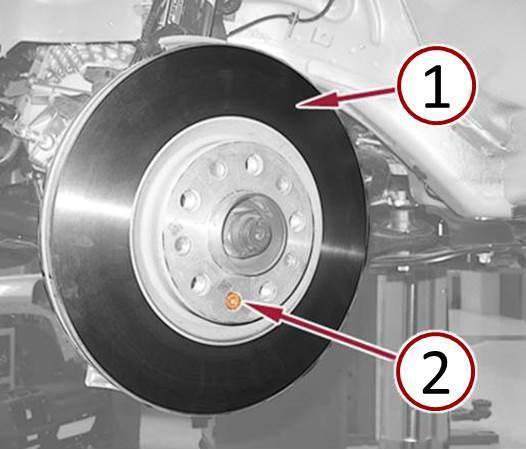
- Remove the brake rotor retaining bolt (Fig. 4).
- Remove the brake rotor (Fig. 4).
Fig. 4 Remove Brake Rotor
1 – Brake Rotor
2 – Brake Rotor Retaining Bolt
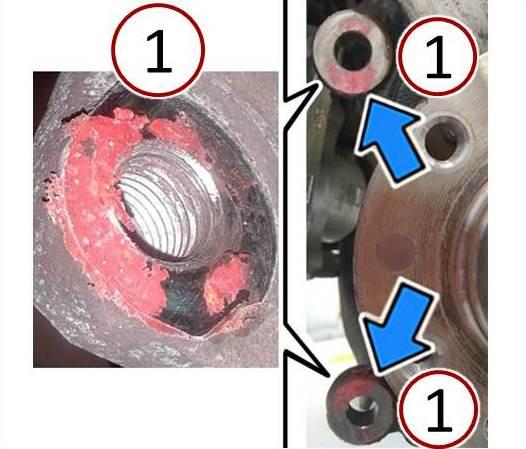
- Clean all the sealant from the contact surfaces between the brake calliper adaptor bracket and the steering knuckle (Fig. 5).
Fig. 5 Clean Off Excess Sealant
1 – Excess Sealant
- Install the brake rotor ensuring that the brake rotor is aligned with the previously created position alignment mark (Fig. 6).
- Install the brake rotor retaining bolt and tighten to 7 N·m (61 In. Lbs.) (Fig. 6).
Fig. 6 Install Brake Rotor
1 – Brake Rotor
2 – Brake Rotor Retaining Bolt
- Install the brake caliper adaptor bracket (Fig. 7).
- Install the NEW brake caliper adaptor bolts and tighten to 165 N·m (122 Ft. Lbs.) (Fig. 7).
Fig. 7 Install Brake Caliper Adaptor Bracket
- – Brake Caliper Adaptor Bolts
- – Brake Caliper Adaptor Bracket
- Install the NEW revised front brake pads in the front brake pad kit from the Parts Required section of this bulletin.
- Position the brake caliper onto the brake caliper adaptor (Fig. 8).
Fig. 8 Install Brake Caliper With Inboard Brake Pad
1 – Brake Caliper
- Install the brake caliper mounting guide pin bolts and tighten to 27 N·m (20 Ft. Lbs.) (Fig. 9).
Fig. 9 Tighten Brake Caliper Guide Pin Bolts
1 – Brake Caliper Mounting Guide Pin Bolts
- Install the front wheels. Refer to the detailed service procedures available in DealerCONNECT> TechCONNECT under: Service Info> 22 – Tires and Wheels> Removal and Installation.
- Lower the vehicle.
- Pump the brake pedal several times until caliper pistons and brake pads are seatedand a firm brake pedal is obtained before moving the vehicle.
- Check and adjust the brake fluid level in the reservoir as necessary.
- Road test the vehicle and make several stops to wear off any foreign material on thebrakes and to seat the brake pads and to verify that the customer’s concern has been eliminated.
POLICY:
Reimbursable within the provisions of the warranty.
TIME ALLOWANCE:
| Labor Operation No: | Description | Skill Category | Amount |
| 05-70-22-9R | Pads, Disc Brake – Replace Front Set (2 – Skilled) | 4 – Chassis Systems | 0.6 Hrs. |
| 05-70-22-9S | Pads, Disc Brake – Replace Front & Remove Sealant From Caliper Bracket Mounting Surfaces (2 – Skilled) | 4 – Chassis Systems | 0.9 Hrs. |
FAILURE CODE:
| ZZ | Service Action |
 Loading...
 Loading...
- Provides an extra margin of safety in extreme braking conditions
- Mix of polyglycol ethers ensures hot brake-system operation will not create dangerous vapor
- Excellent for ABS, disc and drum brake systems
- Delivers braking power when needed by avoiding a spongy pedal
- Both wet and dry boiling points exceed the minimum government standards
- High compatibility. Use with or direct replacement for DOT 3, DOT 4, and DOT 5. 1
- Extended Service Interval (ESI): Lasts 100 percent longer than DOT 3, 50 percent longer than DOT 4, and 10 percent longer than DOT 5. 1
- Exceeds all DOT 3, DOT 4, and DOT 5. 1 standards
- Wet boiling point ~ 365 DegreeF/Viscosity at -40 DegreeC ~ 685mm2/s
- Standard brake fluid has a recommended change interval of 2 years. The recommended change interval for Bosch ESI6 is 3 years.
- Premium DOT 3 Brake Fluid has a minimum boiling point of 450°F
- Meets and exceeds DOT 3 and all other Federal and SAE specifications and standards for motor vehicle brake fluids
- Mixes with all DOT 3 approved brake fluids
- Designed for use in disc, drum and ABS brake systems
- Premium brake and hydraulic clutch fluid that protects internal components from corrosion under normal use
- High boiling point to minimize brake fluid boiling and vapor lock
- Excellent low temperature capability and stability when used where lower cold viscosities are required
- Excellent low temperature capability and stability when used where lower cold viscosities are required
- Synthetic quality brake fluid
- Contains special ingredients to guard against vapor lock and moisture absorption
- Exceeds requirements for both DOT 3 and DOT 4 brake fluids
- Specially formulated for DOT 4 brake fluid applications
- Designed for use in disc, drum and ABS brake systems
Last update on 2025-05-08 / Affiliate links / Images from Amazon Product Advertising API
This product presentation was made with AAWP plugin.
 Renegade