NUMBER: 23-040-15
GROUP: Body
DATE: October 31, 2015
SUBJECT:
Right Sliding Door Will Not Open From Exterior
OVERVIEW:
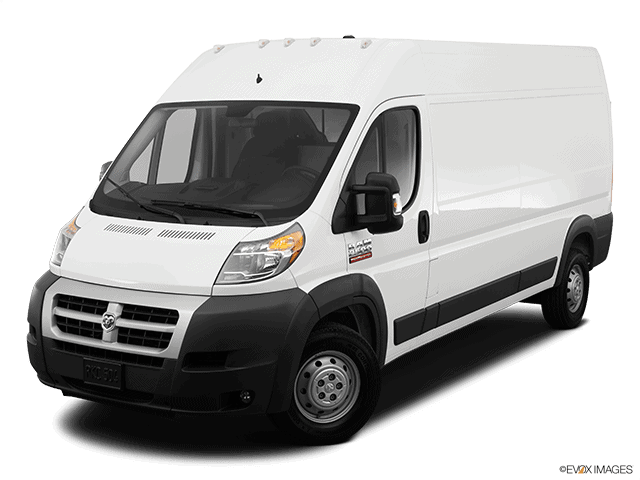
This bulletin involves replacing the right sliding door exterior handle and rerouting door cable.
MODELS:
| 2014 – 2015 | (VF) | Ram Pro Master |
NOTE: This bulletin applies to vehicles within the following markets/countries: NAFTA
NOTE: This bulletin applies to vehicles built on or before April 20, 2015 (MDH 0420XX).
SYMPTOM/CONDITION:
The customer may describe that the right sliding door may not open using the exterior handle.
DIAGNOSIS:
If the customer describes the condition, perform the Repair Procedure.
PARTS REQUIRED:
| Qty. | Part No. | Description |
|---|---|---|
| 1 | 06106950AA | Clip |
| 1 | 5RK14JXWAB
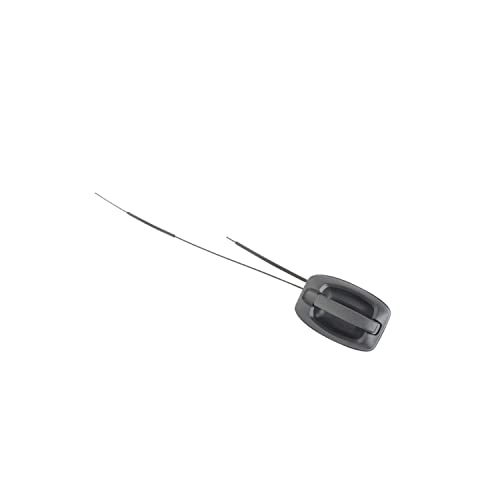
Mopar 5RK14JXWAB HANDLE SLIDING DOOR
| Exterior Door Handle assembly |
REPAIR PROCEDURE:
- Open right sliding door.
- Remove the trim panel. Refer to 23 – Body/Doors – Sliding/PANEL, Door Trim/Removal.
- Remove rubber bump stop (Fig. 1).
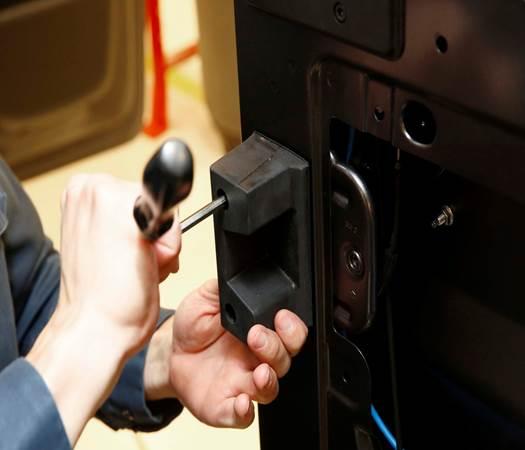
Fig. 1 Bump stop
- Remove the interior door handle. (Refer to 23 – Body/Doors – Sliding/HANDLE, Interior/Removal) (Fig. 2).
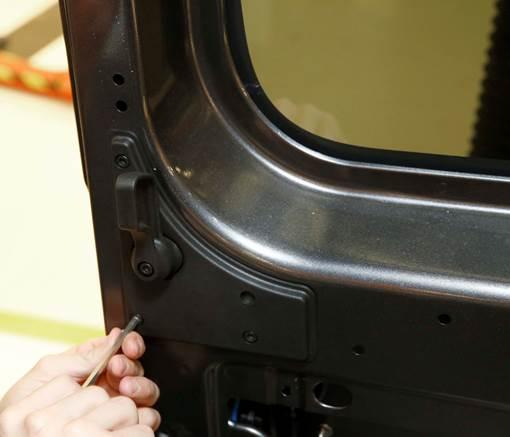
Fig. 2 Interior handle
- Remove four mounting nuts (1) to outer handle (Fig. 3).
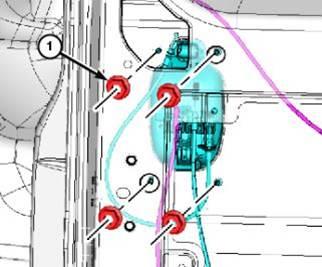
Fig. 3 Door handle nuts
1 – Nuts
- Remove handle from vehicle and disconnect cable at exterior handle (Fig. 4).
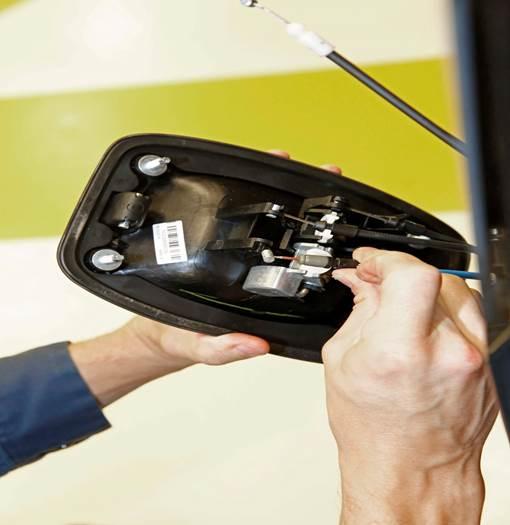
Fig. 4 Cable connections
- Remove the cable at the hold open latch from the lower area of the side door (Fig. 5).
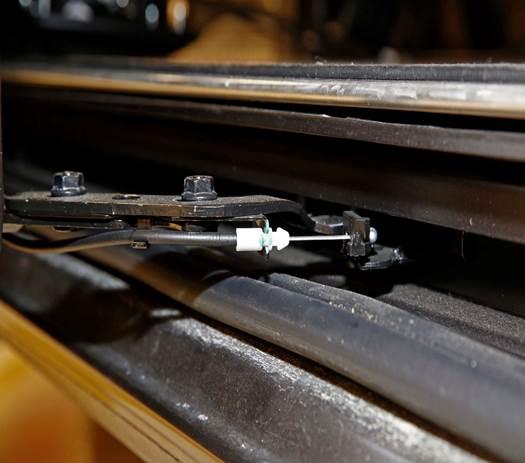
Fig. 5 Hold open latch cable
- Disconnect interior door handle cable from the handle assembly (Fig. 6).
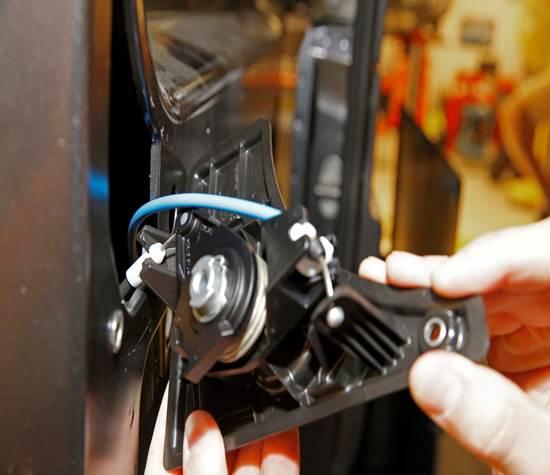
Fig. 6 Inside door handle cables
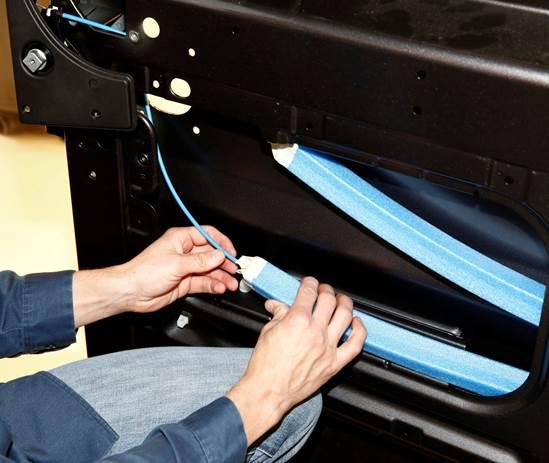
Fig. 7 Remove tape from foam
- Remove foam from cable (Fig. 8).
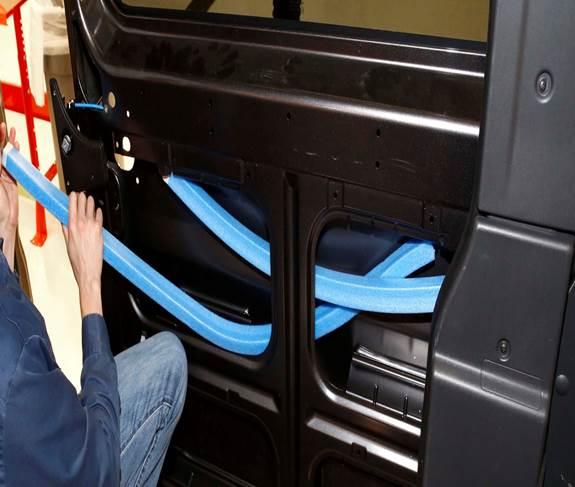
Fig. 8 Remove foam from cable
- Install additional clip to inside door (Fig. 9).
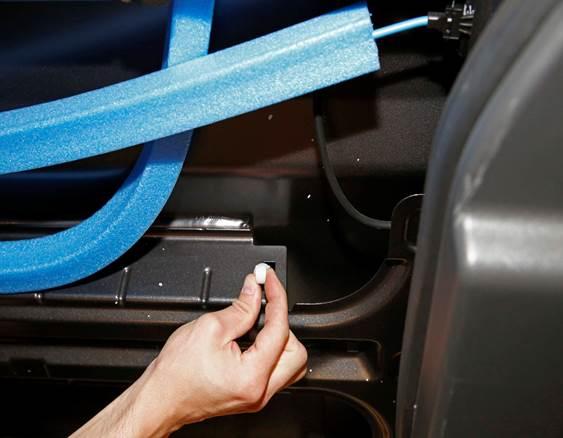
Fig. 9 Install additional clip
- Measure the distance from clip to clip and then subtract 102 mm (4.0 in) from the total measurement (Fig. 10).
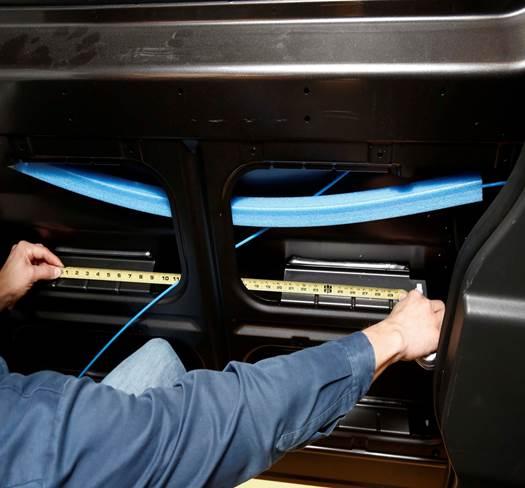
Fig. 10 Measure distance from clip to clip
- Measure and mark the long foam that was removed to measurement (Fig. 11).
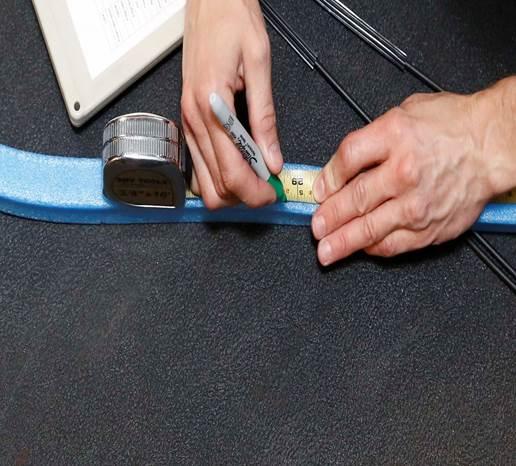
Fig. 11 Measure foam to cut
- Cut the foam at mark.(Fig. 12)
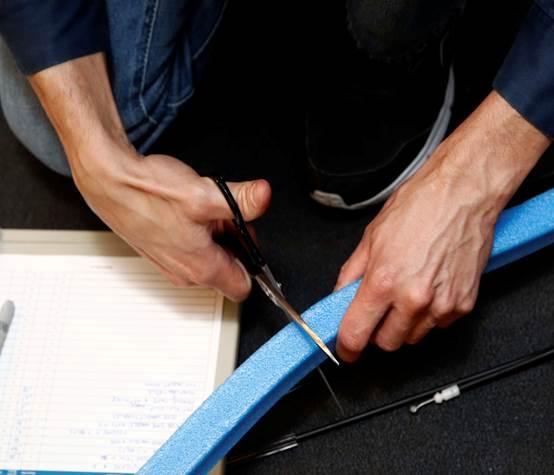
Fig. 12 Cut foam
- Measure (Fig. 13) the remaining smaller length of foam and cut 185 mm (7.25 in) from the foam (Fig. 14). Then discard the excess cut piece of foam.
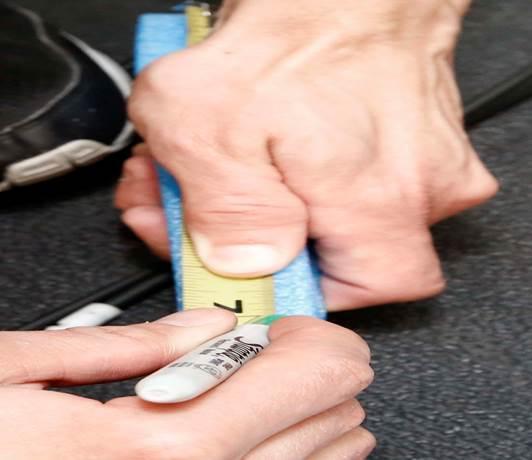
Fig. 13 Measure smaller foam
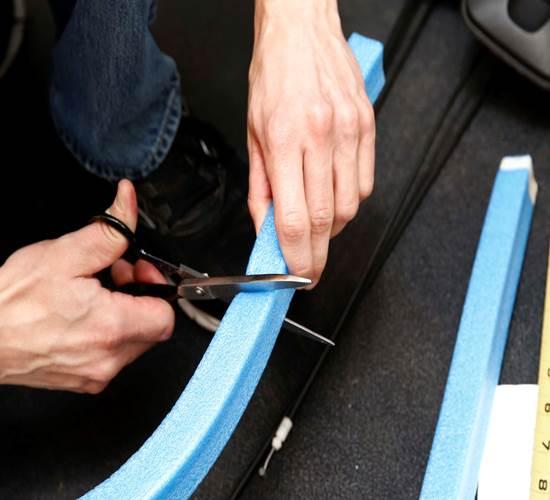
Fig. 14 Cut smaller foam
- Slide the 185 mm (7.25 in) piece of foam over the cable to the latch side (Fig. 15).
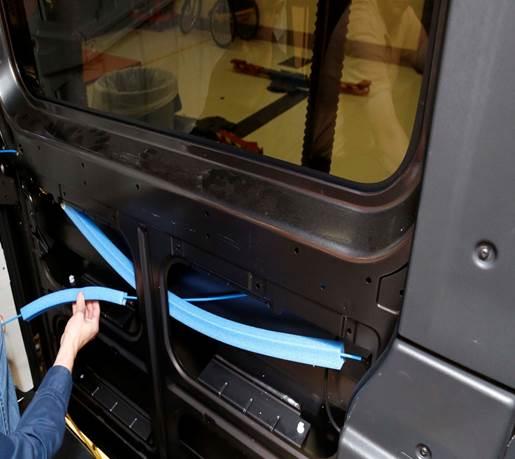
Fig. 15 Install small foam
- Slide the larger piece of foam over the cable and connect cable to the clip toward the rear of the door (Fig. 16).
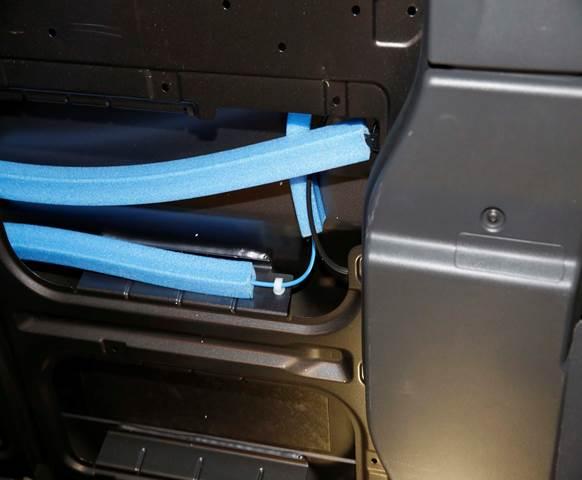
Fig. 16 Cable in clip
- Connect cable to the clip toward the front of the door and leave 51 mm (2.0 in) on each side from clips (Fig. 17).
NOTE: On earlier built vehicle the foam may be split; in this case tape the end of the foam to secure foam in place.
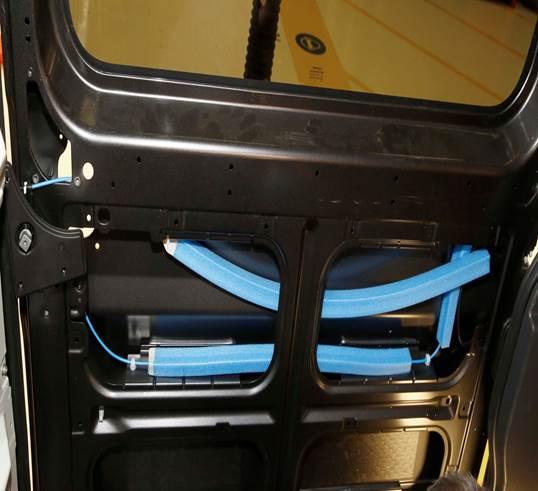
Fig. 17 Cable properly routed and secured
- Connect the blue cable to the handle assembly (Fig. 18).
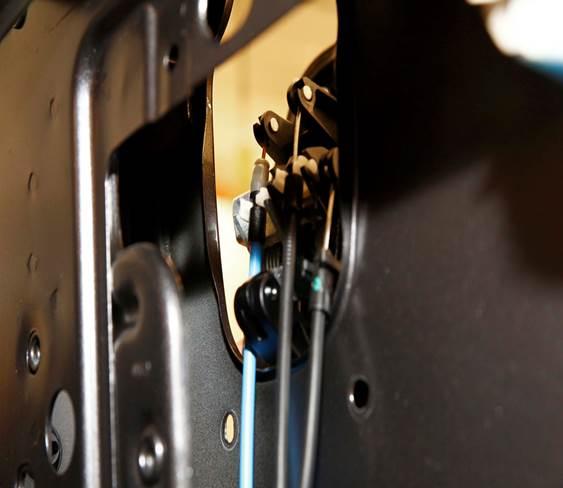
Fig. 18 Door handle cables attached
- Route (Fig. 19) and connect the cable at the lower part from the side door (Fig. 5).
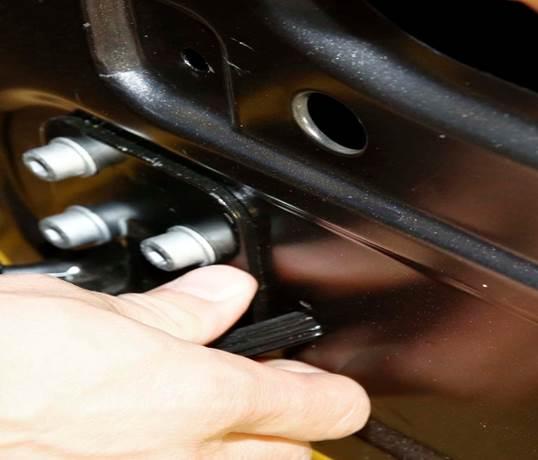
Fig. 19 Routing open latch cable through door
- Install the handle to the vehicle and engage cable at interior handle (Fig. 6).
- Install the four mounting nuts (1) to outer handle (Fig. 3). Tighten to 9 N·m (80 in.lbs).
- Install the interior door handle. (Refer to 23 – Body/Doors – Sliding/HANDLE, Interior/Installation) (Fig. 2).
- Install rubber bump stop ( 1). Tighten to 25 N·m (221 in.lbs).
- Install the trim panel. (Refer to 23 – Body/Doors – Sliding/PANEL, Door Trim/Installation).
POLICY:
Reimbursable within the provisions of the warranty.
TIME ALLOWANCE:
| Labor Operation No: | Description | Skill Category | Amount |
|---|---|---|---|
| 23-42-15-93 | Handle, door outside – Replace Sliding Door- Right (1 – Semi-Skilled) | 6 – Electrical and Body Systems | 0.4 Hrs. |
FAILURE CODE:
| ZZ | Service Action |
23-040-15

- Car Interior Cleaner Pack: The Armor All car cleaning kit includes one 30-count canister of Armor All Cleaning Wipes, one 30-count canister of Protectant Wipes and one 30-count canister of Glass Wipes; use these as on-the-go car cleaner wipes
- Protectant Car Interior Wipes: Armor All wipes clean, shine and protect interior vinyl, rubber, plastic, trim and dashboards; shield against UV damage, fading and aging; and leave a medium shine with no greasy residue
- Cleaning Wipes To Remove Stains: Safe for interior auto surfaces, these interior car cleaner wipes clean dashboards, vinyl, clear plastics, carpet and fabric, and remove tough dirt, dust and grime as well as stubborn smudges from sunscreen and more
- Auto Glass Cleaner And Screen Cleaning Wipes: Formulated for your car’s windows, tinted glass, mirrors and technology screens, these Armor All car glass wipes quickly remove tough road dirt, insects and fingerprints to enhance visibility
- Lint-Free Car Wipes: Lint-free, pre-moistened Armor All car interior protectant wipes, car window cleaner wipes and cleaning wipes are an ideal addition to car cleaning products for vehicle owners, rideshare drivers and commuters

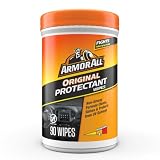
- Armor All Original Protectant Wipes: One 90 count canister of Armor All Protectant car interior wipes; ideal addition to your car cleaning kit
- Medium Shine: The non-greasy, streak-free interior car cleaner formula leaves behind a medium shine that rejuvenates dull surfaces
- Cleans, Shines And Protects Interiors: Car interior cleaner designed to clean, shine and protect interior auto surfaces such as vinyl, rubber, plastic, trim and dashboards
- Tested Safe For Automotive Surfaces: Our interior car wipes are tested safe for automotive surfaces and preserve your car's inherent beauty without damaging delicate materials
- UVA And UVB Sun Protection: Triple-action UV protectant car cleaning wipes easily lift away dirt and debris, enhance color and shine, and prevent UVA and UVB sun damage, fading and aging; they perfectly fit your car detailing kit

- Interior Car Wipes: One 90 count canister of Armor All wipes for car interior; a car essentials to your car cleaning kit
- Clean Dashboards, Vinyl, Carpet, Fabric And More: Interior car cleaner wipes that offer powerful cleaning for interior auto surfaces such as dashboards, vinyl, clear plastics, carpet and fabric; not recommended for glass, leather, or painted surfaces
- Stain-Removing Formula: These car interior cleaning wipes can easily remove tough dirt, dust and grime as well as stubborn smudges from sunscreen, insect repellent and more; they are perfect to add to your car cleaning supplies
- Convenient Disposable Wipes: Armor All cleaning wipes are a convenient and effective way to keep your car interior cleaner; just wipe the surface clean using the car interior cleaner wipes
- Natural Matte Finish: Lint-free car detailing wipes stay moist and leave a matte finish that creates a natural look; ideal for car owners and commuters to add to their cleaning supplies for car care

- Preserve the rich look of your leather seats with Armor All Leather Care Wipes. These convenient car wipes clean, condition and protect leather. The leather cleaner reaches into the grain, lifting dirt and soil. Then leather conditioner enhances the grain's natural beauty and supple feel. Finally, the leather wipes leave behind a protectant with agents that help shield against spills, cracking and fading. Renew the luxurious look of your leather seats, paneling and dashboard and other goods with the advanced leather cleaner. A Moisture Lock Lid keeps these Armor All wipes fresh for one year.
- Leather Wipes: One 20 count canister of Armor All Leather Care Wipes
- Disposable Car Wipes: A convenient, disposable wipe formulated for leather care
- Versatile Cleaner: Cleans, conditions and protects your car's leather
- Removes Dirt: Cleansing agents reach into the grain of the leather to remove dirt and soil

- Powerful cleaning for automotive surfaces
- Convenient disposable wipe removes ground-in dirt, dust & grime
- Natural matte finish
- Great for car dash, vinyl, fabric, carpet, consoles, leather & more
- Won't dry out, damage or fade automotive surfaces
This product presentation was made with AAWP plugin.