| “This site contains affiliate links for which OEMDTC may be compensated” |
NUMBER: 21-001-06
GROUP: Transmission
DATE: January 14, 2006
SUBJECT:
Flash – Rough or Shudder On 1-2 Upshift
OVERVIEW:
This bulletin involves verifying the 2-4 clutch volume index is over 20 and if necessary selectively erasing and reprogramming the Powertrain Control Module (PCM) with new software and performing a TCM Quicklearn.
MODELS:
| 2005 | (PL) | Neon |
NOTE: This bulletin applies to all 2005 PL vehicles equipped with a 2.0L engine (sales code ECB) and a automatic transmission (sales code DGL).
SYMPTOM/CONDITION:
Vehicle may exhibit roughness or shudder on a 1-2 upshift.
DIAGNOSIS:
Using a Scan Tool (DRBIII) with the appropriate diagnostic procedures available on TechCONNECT, verify all transmission systems are functioning as designed. If DTCs are present, record them on the repair order and repair as necessary before proceeding further with this bulletin.
If the customer describes the Symptom/Condition is present, perform the Repair Procedure.
PARTS REQUIRED:
| Qty. | Part No. | Description |
|---|---|---|
| 1 | 04275086AB | Label, Authorized Modification |
SPECIAL TOOLS/EQUIPMENT REQUIRED:
| NPN | Battery Charger |
| CH2002 | General Purpose Interface Bus Cable Assembly |
| CH6000A | Scan Tool (DRBIII) |
| CH7000A/7001A | J1962 Cable with red DRBIII connector |
| TechCONNECT Workstation |
NOTE: An updated J1962 cable has been released. This cable has a red colored connector at the DRBIII connection. Use this cable whenever a flash is being performed.
REPAIR PROCEDURE:
- Using the DRBIII read the transmission sensor 2-4 CL Vol Index value. Is the index value 20 or below?
- Yes, proceed to Step #2.
- No, this bulletin does not apply.
NOTE: Whenever a controller is programmed, the software in the DRBIII; must be programmed with the latest revision level available.
NOTE: If this flash process is interrupted/aborted, the flash should be restarted and then follow the directions on the DRBIII.
- Before beginning the reprogramming procedure, remove any old flash reprogramming files from the DRBIII memory. To clear the memory from the MAIN MENU: a. Simultaneously press the “MORE” and “YES” keys.
- A screen will appear requesting a “COLD BOOT”.
- Follow the on screen instructions by selecting the “F4” key.
- When the DRB III reboots to the MAIN MENU, proceed to Step #3
- With the ignition switch in the “RUN” position, determine the original part number of the PCM currently in the vehicle. Using the DRBIII select: a. “DRBIII Standalone”
- Connect the DRBIII to TechCONNECT. Open TechTOOLS and verify that the “DRBIII Status: Connected” message is in the upper right corner of the TechTOOLS screen.
- Enter the “PCM part #” recorded in Step #3 in the “Parts Criteria” area and select “Show Updates”. TechTOOLS will populate the appropriate calibration.
- Select the calibration.
- Select the “DRBIII” radio button which is next to the “Download/Update” button.
- Select the “Download/Update” button.
- Monitor the “Flash Download/Update Progress” window on the TechCONNECT and follow the instructions on TechCONNECT. When the flash process is complete, proceed to Step #10.
- Disconnect the DRBIII from TechCONNECT.
- Open the hood, install a battery charger and verify that charging rate providesapproximately 13.5 volts.
- Connect the DRBIII to the vehicle.
- Download the flash from the DRBIII to the vehicle. Using the DRBIII select: a. “Vehicle Flash”
- Follow the directions on the DRBIII screen. When the flash process is complete, proceed to Step #14.
NOTE: Due to the PCM programming procedure, a DTC may be set in other modules (TCM, BCM, MIC, SKIM, etc.) within the vehicle, if so equipped. Some DTC’s may cause the MIL to illuminate. Check all modules using “Module Scan”, record the DTC’s, and erase these DTC’s prior to returning the vehicle to the customer. Erase any DTC’s in the PCM only after all other modules have had their DTC’s erased.
NOTE: The following step is required by law.
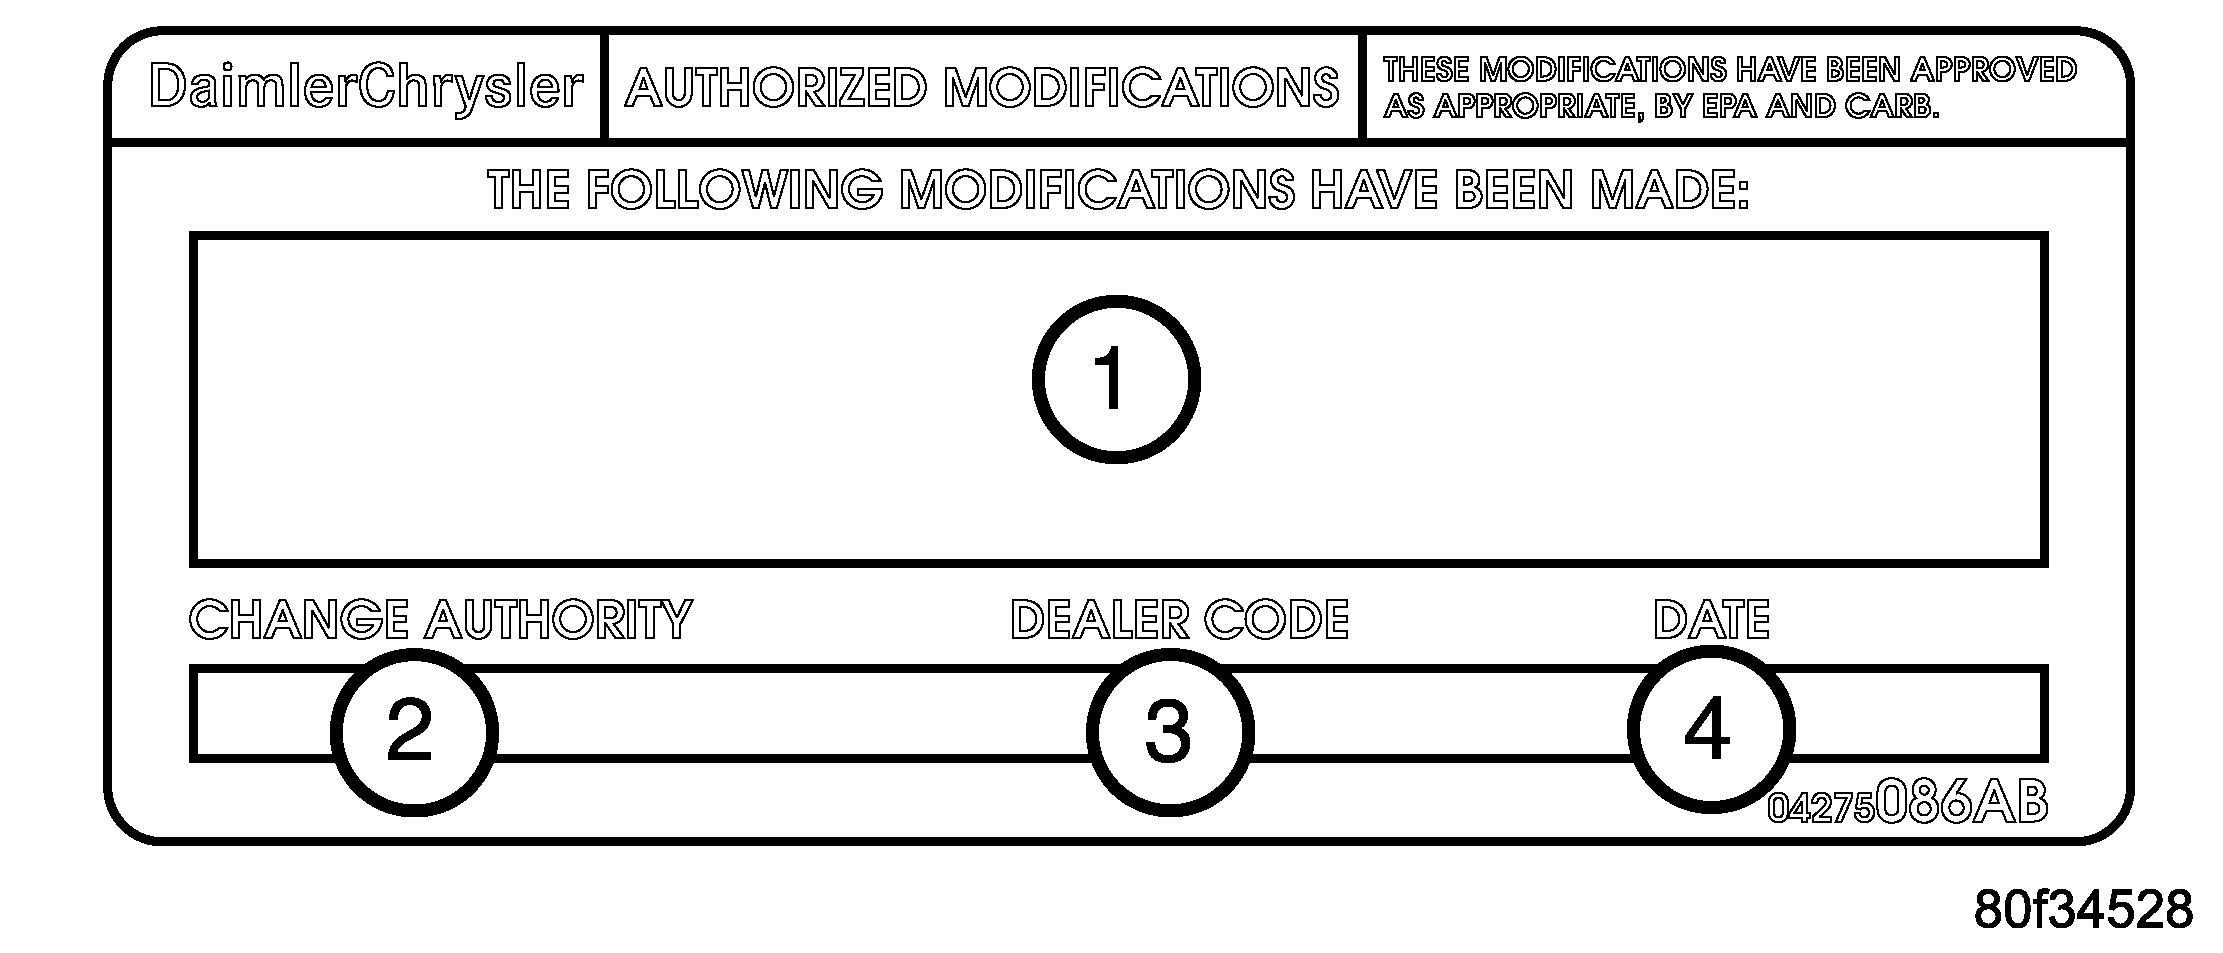
- Type the necessary information on the “Authorized Modification Label” p/n04275086AB and attach near the VECI label ( 1).
- Using the DRBIII perform the TCM Quicklearn procedure.
Fig. 1 AUTHORIZED MODIFICATION LABEL
1 – POWERTRAIN CONTROL MODULE P/N (INSERT P/N) USED
2 – CHANGE AUTHORITY: TSB XX-XXX-XX
3 – DEALER CODE: XXXXX
4 – DATE: XX-XX-XX
POLICY:
Reimbursable within the provisions of the warranty.
TIME ALLOWANCE:
| Labor Operation No: | Description | Amount |
|---|---|---|
| 18-19-06-13 | Reprogram Powertrain Control Module and perform Quicklearn Procedure | 0.7 Hrs. |
FAILURE CODE:
| ZZ | Service Action | |
THE DRBIII FLASH FILES FOR THIS BULLETIN ARE AVAILABLE ON DealerCONNECT.
FOR MARKETS OUTSIDE OF THE UNITED STATES AND CANADA, THE FLASH FILES AND REPROGRAMMING INSTRUCTIONS WILL BE AVAILABLE ON ITIL/ISIS DVD MARCH, 2006.
 Loading...
Chrysler J2534 Application Overview
The Chrysler J2534 System is a combination of the J2534 Application (2010 and newer Model Year Support) and the Chrysler
 J2534 Flash Application (2009-1996 Model Year Support). J2534 aftermarket users are required and responsible for installing the J2534 device driver provided by the device manufacturer. If you need support installing the device driver software contact the device manufacturer. See the related article “Chrysler J2534 Manual” for additional information. Chrysler
 J2534 application provides below capabilities:
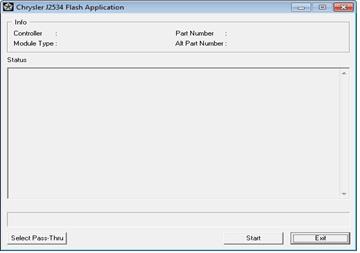
The Chrysler J2534 Flash Application: J2534 Flash Application: | |
 | Application Usage and Support |
| |
| |
Chrysler Recommended J2534 Devices
For Chrysler recommended J2534 device, see below table.
| J2534 Device | Firmware Version |
| CTC Vehicle Box * | 1.9 |
| UCAN 2 | 1.0 |
| Blue Streak -2534 Global Programmer | 2.10 |
| Actia I+ME Passthru | 2.07 |
* Chrysler recommends the CTC Vehicle Box Device for Chrysler
 SCI ECU reprogramming. SCI reprogramming is used on most PCMs and TCMs prior to the introduction of CAN bus vehicles which began in 2004 (Durango).
Chrysler J2534 System Support:
Support for Chrysler J2534 System is available on-line. For more information, please refer to Chrysler J2534 Manual and knowledge base website.
Chrysler J2534 System
PC Requirements for Chrysler J2434 System:
The Chrysler J2534 Application has been verified to work with the following operating systems using open platform PCs or laptops:
• Windows 7 (32-Bit & 64-Bit)
• Windows XP (32-Bit only)
Chrysler J2434 System Release Notes:
Please click here to view the Application Release Notes.
Chrysler J2434 System Download:
For Chrysler J2534 System support, please refer to “Chrysler J2534 Manual“. Get the J2534 system.
Chrysler ECU Flash Availability matrix:
Click Flash Availability–J2534 Application and Flash Availability–Chrysler Diagnostic Application.
Adaptor Requirements:
A harness adaptor is required to update certain vehicles. The following tables list which vehicles / modules require which adaptor. Adaptors can be purchased through the SPX Miller Special Tools program. See SPX Miller Special Tools program for details.
MLR-J2534-MMC required on:
| SBEC III | 1996 – 1997 | SEBRING / AVENGER (FJ) |
| ETAX III | 1996 – 1997 | SEBRING / AVENGER (FJ) |
| SBEC IIIA | 1997 – 1998 | SEBRING / AVENGER (FJ) |
| ETAX IIIA | 1997 – 1998 | SEBRING / AVENGER (FJ) |
| Powertrain | 2001 – 2201 | SEBRING / STRATUS COUPE (ST) |
MLR-J2534-TCM required on:
| ETAX IIIB | 2003 – 2004 | SEBRING / STRATUS SEDAN (JR) |
| ETAX IVA | 2005 – 2006 | LIBERTY (DIESEL) JEEP (KJ) (KJ) |
Additional Information and Known Issues / Concerns:
If you are reprogramming the 5.9L diesel engine controller on the 1996-2008 Dodge RAM
RAM vehicle, it is necessary to also reprogram the VIN after the ECU has been flashed. To write the VIN to the ECU, you may use aftermarket software support, or use an OEM FCA US LLC scan tool (DRBIII or StarSCAN). For more information, see the FCA US LLC Scan Tool Lease Options section.
- 1996-2009 ALL PCMs
If you are REPLACING a PCM or ECM and the vehicle is equipped with a theft deterrent system (Sentry Key), it must be initialized to properly function with the Anti Theft module. You also need to reprogram the VIN when replacing a PCM or ECM. To write the VIN to the ECU and initialize the PCM to work with the theft deterrent system, you may use aftermarket software support, or use an OEM FCA US LLC scan tool (DRBIII or StarSCAN). For more information, see the FCA US LLC Scan Tool Lease Options section.
FCA US LLC Scan Tool Lease Options:
- For 2009 model year vehicles and prior, it may be necessary to use either a DRBIII or a StarSCAN to perform function required after ECU replacement. To lease the DRBIII call 1-586-532-8400 or click here.
- Beginning with 2010 MY, function required to replace an ECU will be supported via the J2534 application.


