| “This site contains affiliate links for which OEMDTC may be compensated” |
NUMBER: 08-034-15
GROUP: Electrical
DATE: April 07, 2015
SUBJECT:
Wire Harness Hanging Down From Rear Bumper Fascia
OVERVIEW:
This bulletin involves attaching the park assist and/or blind spot detection wire harness to the rear bumper fascia.
MODELS:
NOTE: This bulletin applies to vehicles built on or before April 16, 2014 (MDH 0416XX) equipped with Blind Spot And Cross Path Detection (sales code XAN) and/or Parksense Rear Park Assist System (sales code XAA).
SYMPTOM/CONDITION:
The customer may describe a wire harness hanging down from the rear bumper fascia.
DIAGNOSIS:
If the customer describes the symptom, perform the Repair Procedure.
PARTS REQUIRED:
| Qty. | Part No. | Description |
|---|---|---|
| 1 | 68272346AA | Tape Kit |
REPAIR PROCEDURE:
- Is the park assist and/or blind spot detection working properly?
- YES>>> Continue with the Repair Procedure Step #2.
- NO>>> Problems with park assist and/or blind spot detection should be repaired first before continuing with this bulletin. Normal diagnosis should be performed.
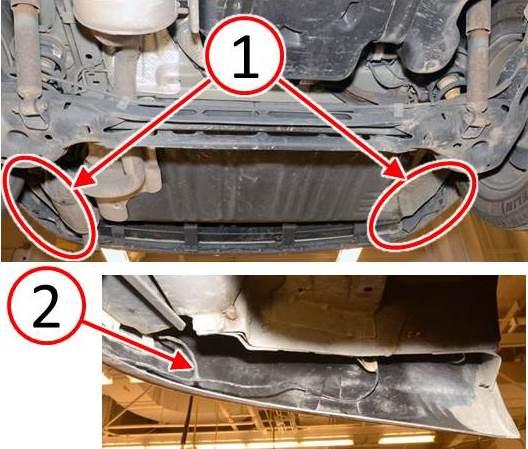
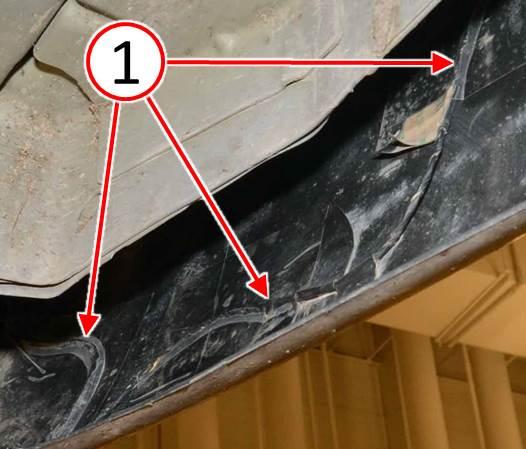
- Inspect the wire harness on the right and left side of the rear fascia (1) for looseness, wire harness (2) not securely attached to the rear fascia (Fig. 1).
- Is the wire harness loose, not securely attached to the rear fascia? (2) (Fig. 1).
- YES>>> Continue with the Repair Procedure Step #4.
- NO>>> This Bulletin does not apply. Normal diagnosis should be performed.
Fig. 1 Wire Harness Loose Not Securely Attached
1 – Inspection Areas
2 – Loose Wire Harness
NOTE: Surface must be free of all dirt, debris, wax, road tar, grease, and oil in the tape application area.
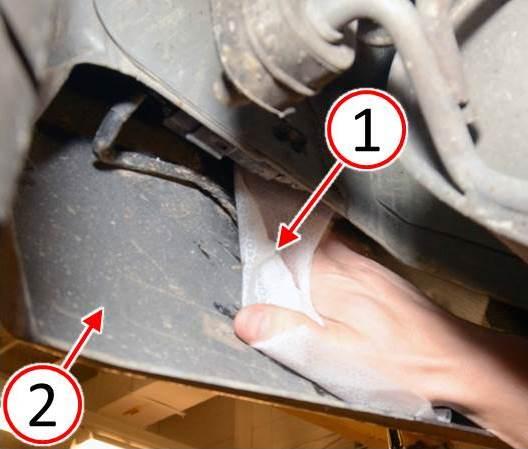
- Using a clean rag (1), thoroughly clean the wire harness and the inside surface of the rear fascia (2) on the right and left sides with wax and grease remover then isopropyl alcohol (Fig. 2).
Fig. 2 Clean Rear Fascia Inside Surface
1 – Clean Rag
2 – Rear Fascia Inside Surface
- Position the wire harness as flat as possible against the inner surface of the rear fascia with no kinks or stress to the wire harness.
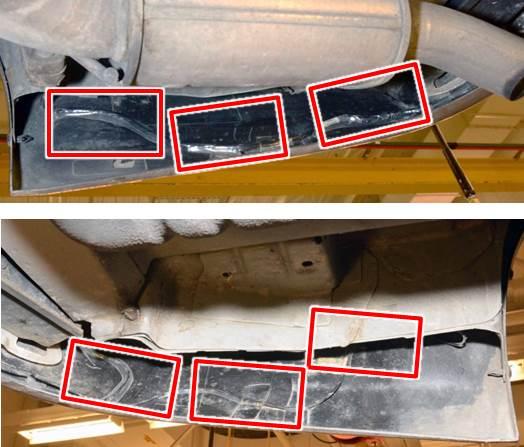
- Visually determine the most appropriate locations to place three pieces of tape in order to attach the wire harness to the inner rear fascia (Fig. 3).
Fig. 3 Tape Application Areas
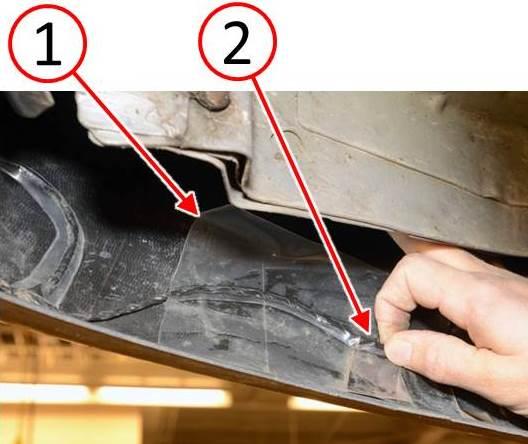
- Apply the tape (1) to the wire harness pinching the tape (2) around the harness to reduce gaps and voids before smoothing the tape out against the fascia inner surface (Fig. 4).
Fig. 4 Apply Tape
1 – Tape
2 – Pinch Tape Around Wire Harness
- Ensure the wire harness lays flat and the three pieces of tape are firmly applied to the fascia inner surface with as few bubbles and voids as possible (Fig. 5).
Fig. 5 Wire Harness Securely Attached
1 – Wire Harness Taped Flat
POLICY:
Reimbursable within the provisions of the warranty.
TIME ALLOWANCE:
| Labor Operation No: | Description | Skill Category | Amount |
|---|---|---|---|
| 08-91-PS-90 | Wiring Harness, Rear Fascia – Inspect Park Distance Sensors/Blind Spot Detection (2 – Skilled) | 6 – Electrical and Body Systems | 0.2 Hrs. |
| 08-91-PS-91 | Wiring Harness, Rear Fascia – Inspect And Tape Park Distance Sensors/Blind Spot Detection (2 – Skilled) | 6 – Electrical and Body Systems | 0.4 Hrs. |
FAILURE CODE:
| ZZ | Service Action |
 Loading...
 Town And Country