| “This site contains affiliate links for which OEMDTC may be compensated” |
NUMBER: 23-020-15 REV. A
GROUP: Body
DATE: July 08, 2015
THIS BULLETIN SUPERSEDES SERVICE BULLETIN 23-020-15, DATED APRIL 09, 2015, WHICH SHOULD BE REMOVED FROM YOUR FILES. ALL REVISIONS ARE HIGHLIGHTED WITH **ASTERISKS** AND INCLUDE A REVISED CLEAN DATE.
THIS SERVICE BULLETIN IS ALSO BEING RELEASED AS RAPID RESPONSE TRANSMITTAL (RRT) 15-058. ALL APPLICABLE SOLD AND UN-SOLD RRT VIN’s HAVE BEEN LOADED. TO VERIFY THAT THIS RRT SERVICE ACTION IS
APPLICABLE TO THE VEHICLE, USE VIP OR PERFORM A VIN SEARCH IN TECHCONNECT. ALL REPAIRS ARE REIMBURSABLE WITHIN THE PROVISIONS OF WARRANTY.
SUBJECT:
Replace Missing Manual Release Cover For The Electric Fuel Door
OVERVIEW:
This bulletin involves installing a cover for the fuel door manual release cable.
MODELS:
| 2015 | (B1) | Jeep Renegade (Latin America Vehicles Only) Renegade (Latin America Vehicles Only) |
NOTE: **This bulletin applies to vehicles built on or before May 25, 2015 (MDH 0525XX).**
SYMPTOM/CONDITION:
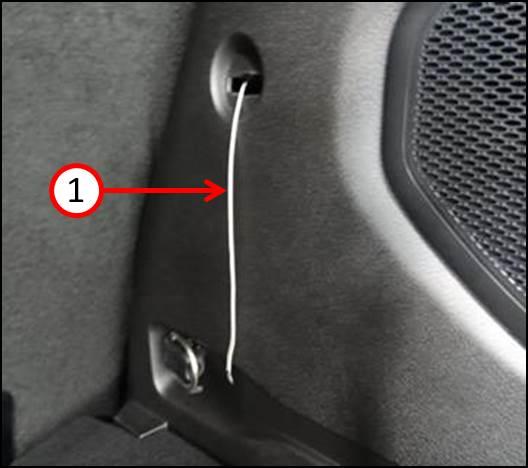
The customer may describe a loose cable hanging in the right rear of the cargo compartment area.
DIAGNOSIS:
If a customer’s VIN is listed in VIP or your RRT VIN list, perform the repair. For all other customers that describe the symptom/condition listed above, perform the Repair Procedure.
PARTS REQUIRED:
| Qty. | Part No. | Description |
|---|---|---|
| 1 | 735623051 | Cover |
REPAIR PROCEDURE:
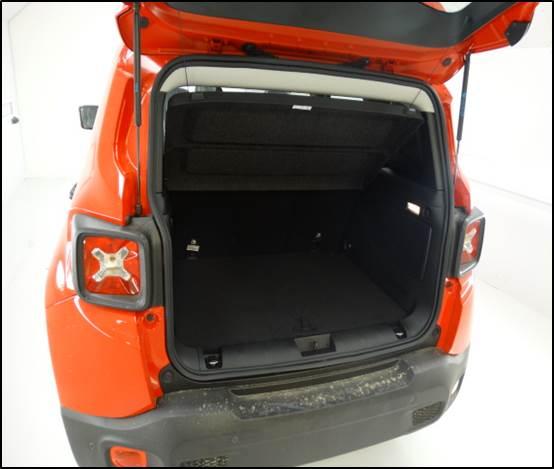
- Open the rear hatch (Fig. 1).
Fig. 1 Rear Hatch
- If cover is not present and cable (1) is hanging perform the repair (Fig. 2).
Fig. 2 Loose Cable
1 – Cable
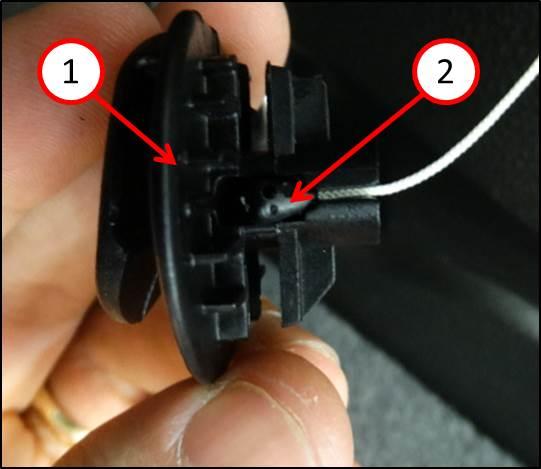
- Install the cable (2) onto the new cover (1) (Fig. 3).
Fig. 3 Cable Insertion
1 – Cover
2 – Cable
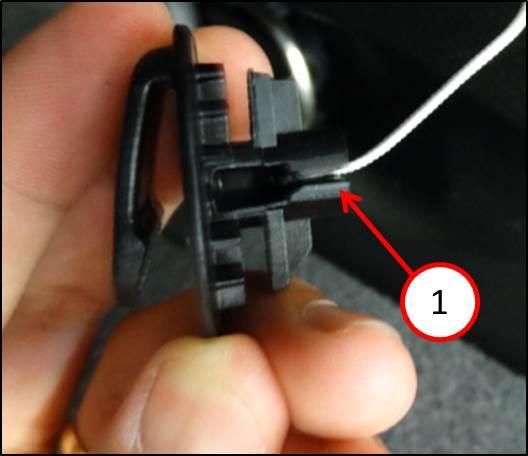
- Make sure the cable is fully inserted into the cover (1) as shown (Fig. 4).
Fig. 4 Cable Fully Inserted Into Cover
1 – Cover
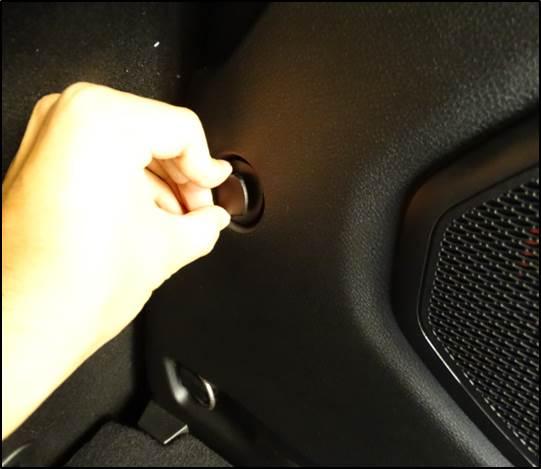
- Install the cover and cable into trim cover as shown and turn the cover 90° counterclockwise until it’s completely locked into place (Fig. 5).
Fig. 5 Installing Cover
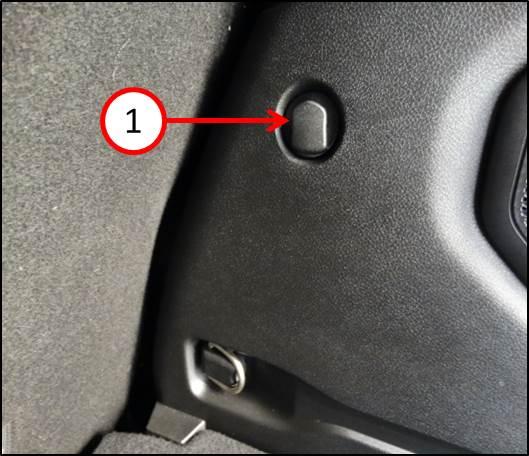
- Make sure the cover (1) is flush and installed properly (Fig. 6).
Fig. 6 Cover Installed
1 – Cover
POLICY:
Reimbursable within the provisions of the warranty.
TIME ALLOWANCE:
| Labor Operation No: | Description | Skill Category | Amount |
|---|---|---|---|
| 23-41-38-90 | Install Release Cover for Manual Fuel Door (1 – Semi-Skilled) | 6 – Electrical and Body Systems | 0.2 Hrs. |
FAILURE CODE:
| ZZ | Service Action |
 Loading...
