| “This site contains affiliate links for which OEMDTC may be compensated” |
September 2015
Dealer Service Instructions for:
Customer Satisfaction Notification N47 Rear Structural Enhancement
Models
| 1999 – 2004 | (WJ) | Jeep Grand Cherokee Grand Cherokee |
| IMPORTANT: Some of the involved vehicles may be in dealer used vehicle inventory. Dealers should complete this repair on these vehicles before retail delivery. Dealers should also perform this repair on vehicles in for service. Involved vehicles can be determined by using the VIP inquiry process. |
Subject
The aftermarket trailer hitch on about 1,443,000 of the above vehicles may adversely affect the rear structure performance during certain low speed rear collisions.
Repair
Vehicles equipped with a trailer hitch must be inspected and replaced if required.
NOTE: The initial inspection process can be done by write up personnel in the write up area. Vehicles found without a trailer hitch can be immediately returned to the customer.
Parts Information
| Part Number | Description |
|---|---|
CBXTN471AA | Hitch, Trailer |
| CBXTN472AA | Hex Head Bolt Package (missing bolts) |
| Each package contains the following components: | |
| Quantity | Description |
| 6 | Bolt, Hex Head |
SPECIAL NOTE: There are a small number of trailer hitch packages (CBXTN471AA ) that may have been built without providing the necessary bolts to install the trailer hitch. Order the above Trailer Hitch Bolt Kit (CBXTN472AA) only if it is determined that the bolt package is missing from the trailer hitch package.
| CBXTN473AA | Trailer Hitch Installation Package |
| Each package contains the following components: | |
| Quantity | Description |
| 1 | Bezel, Fascia Opening |
| 1 | Template, Paper |
| 12 | Pin, Plastic Push |
| 12 | Rivet, Plastic |
| CBXTN474AA | Trailer Hitch-to-Skid Plate Brace Package |
| Each package contains the following components: | |
| Quantity | Description |
| 2 | Brace, Trailer Hitch-to-Skid Plate |
| 4 | Nut, Hex |
Each dealer to whom vehicles in the notification were assigned, will receive enough trailer hitches and bolt packages to service about 20% of those vehicles.
| Part Number | Description |
|---|---|
| 68264812AA | Bracket, 7-Pin Trailer Hitch Wiring Connector (only required for vehicle with seven pin electrical connector) |
Special Tools
The following special tool is required to perform this repair:
| Gauge, Trailer Hitch Clearance |
Service Procedure
A. Inspect for Trailer Hitch in Write-up Area
NOTE: The initial trailer hitch inspection can be done by write up personnel in the write up area. Vehicles without a trailer hitch can be immediately returned to the owner. See the “Completion Reporting and Reimbursement” section of this recall for special claims processing information.
Visually inspect the rear of the vehicle:
- If the vehicle does not have a trailer hitch, no further action is required. Return the vehicle to the customer.
- If the vehicle has a factory installed trailer hitch, no further action is required. Return the vehicle to the customer.
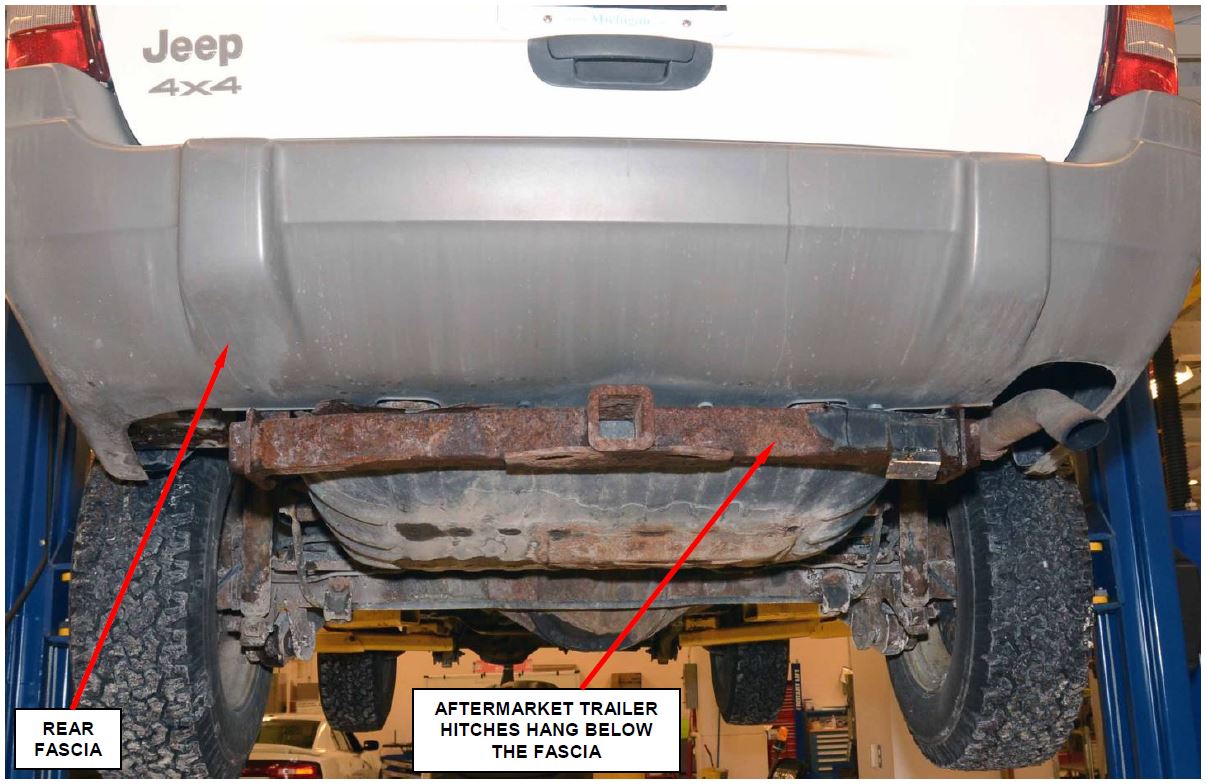
- If the vehicle has an aftermarket trailer hitch, the vehicle will require additional inspection. Continue with Section B: Inspect the Trailer Hitch.
Figure 1 – Aftermarket Trailer Hitch
B. Inspect the Trailer Hitch
- If the aftermarket trailer hitch mounts under the fascia (Figure 1), replace the trailer hitch assembly. Continue with Section C. Replace Aftermarket Trailer Hitch.
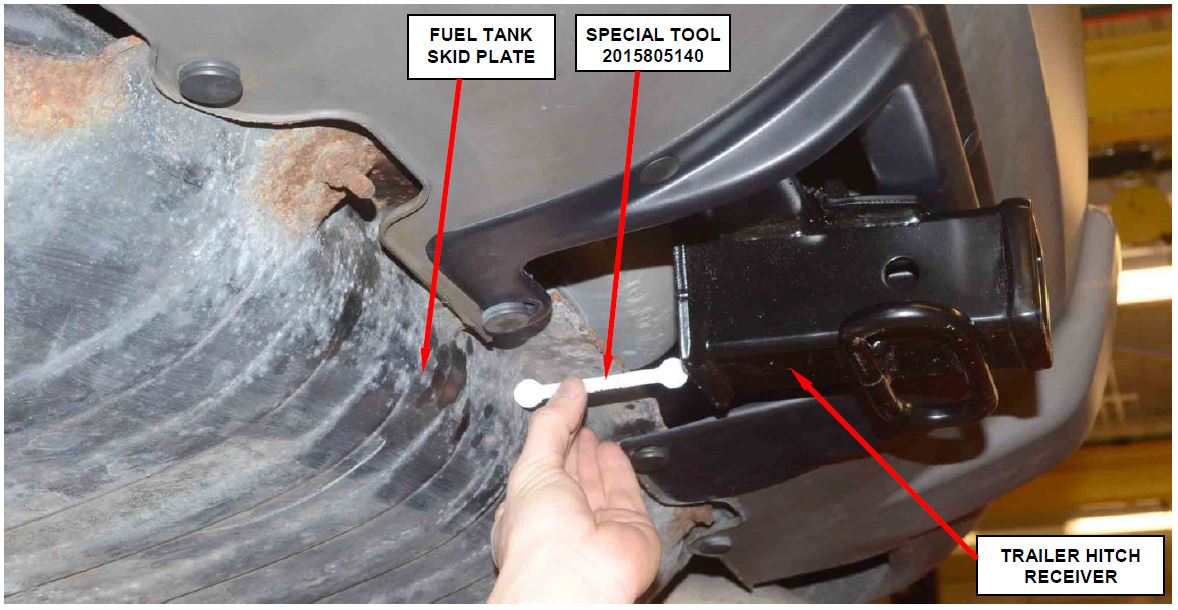
- If the aftermarket trailer hitch has a cutout in the fascia for the trailer hitch, check for clearance with special tool 2015805140. Use the following procedure to check the clearance:
a. Lift the vehicle on a hoist.
b. Place the special tool between the back of the trailer hitch receiver and the skid plate:
- If the tool fits between the trailer hitch receiver and the skid plate, no further action is required (Figure 2). Lower the vehicle from the hoist and return the vehicle to the customer.
- If the tool will not fit between the trailer hitch receiver and the skid plate (receiver is too close to the skid plate), the trailer hitch must be replaced. Continue with Section C. Replace Aftermarket Trailer Hitch.
Figure 2 – Measure the Clearance Between the Trailer Hitch Receiver and the Fuel Tank Skid Plate
C. Replace Aftermarket Trailer Hitch
- Lift the vehicle on the hoist.
- For vehicles with trailer hitch wiring, detach the wiring and/or connector from the trailer hitch.
- Remove and discard the aftermarket trailer hitch from the vehicle.
- Cut out the paper template that came with the trailer hitch installation package.
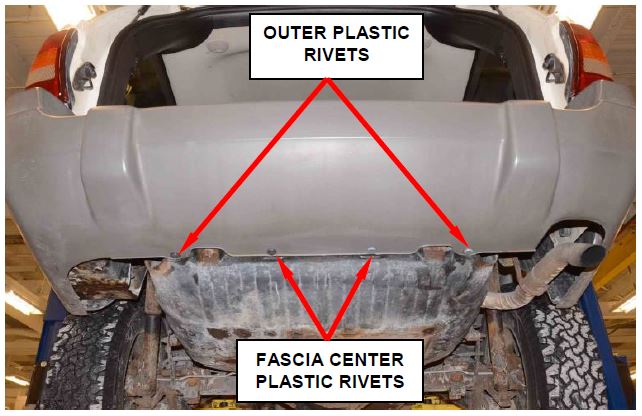
Figure 3 – Fascia Center Plastic Rivets
- Remove and save the two fascia center plastic rivets (Figure 3).
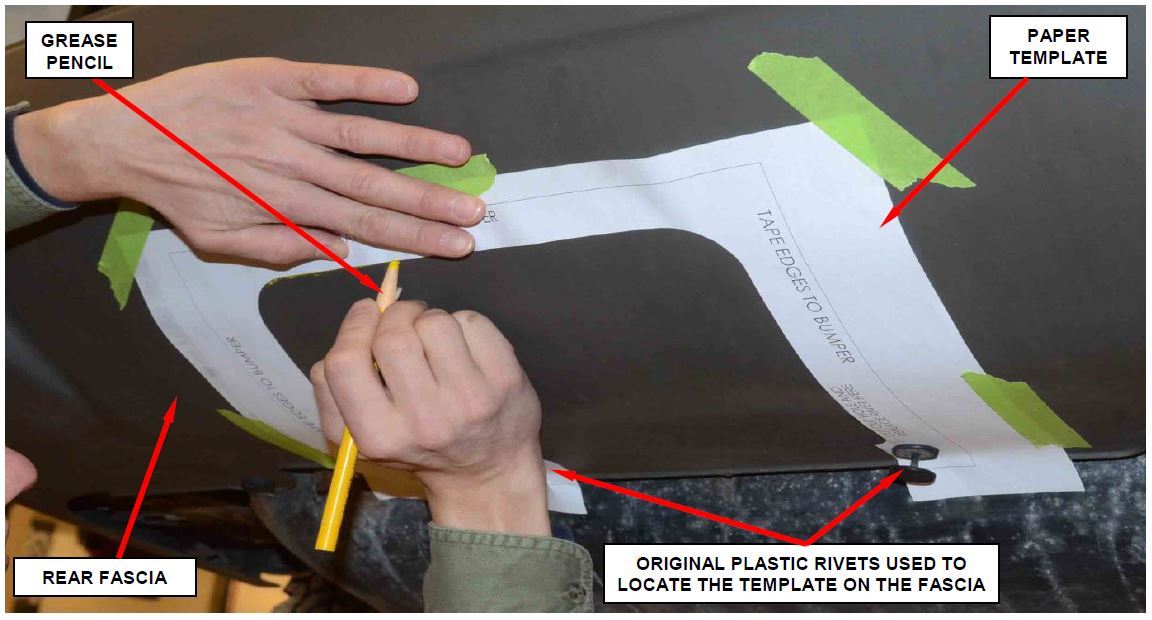
- Install the paper template onto the fascia (Figure 4). Use original plastic rivets to locate the paper template on the fascia.
- Trace the inside edge of the template onto the fascia (Figure 4).
Figure 4 – Install Template and Mark Hole Location on Fascia
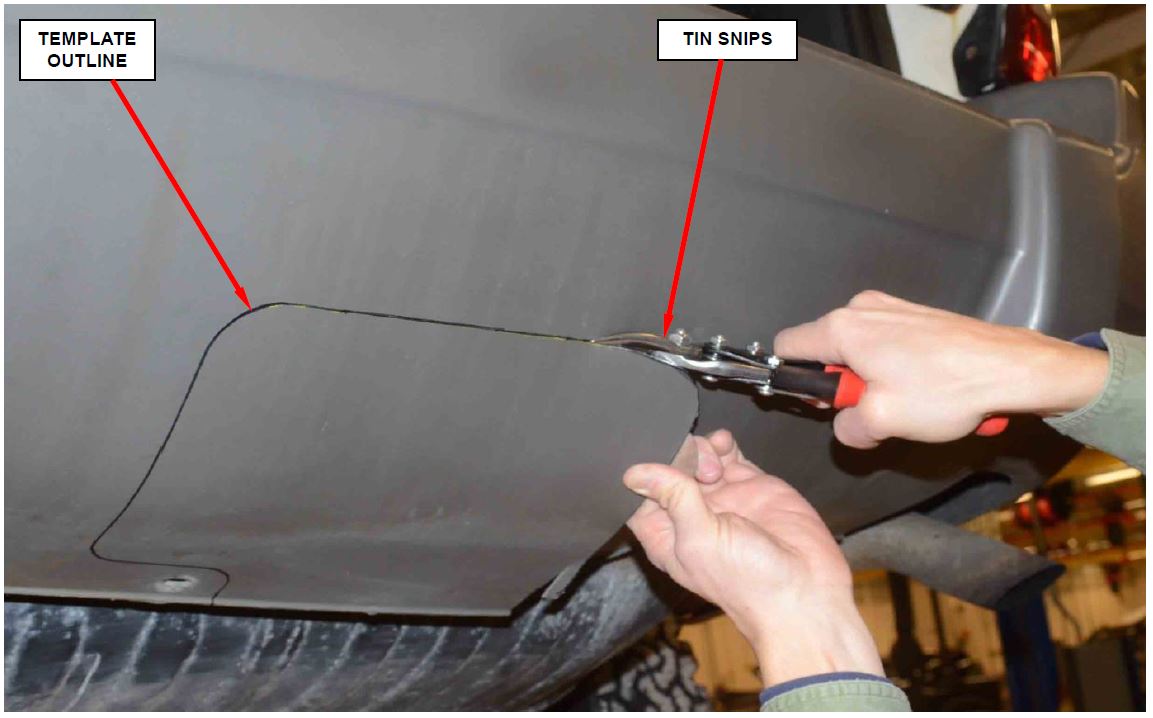
Figure 5 – Cut Out Trailer Hitch Opening in Fascia
- Remove and discard the paper template.
- Remove and save the two fascia outer plastic rivets (Figure 3).
- Using tin snips or equivalent, carefully cut out the trailer hitch opening on the fascia by following the line made in Step 7 of this procedure (Figure 5).
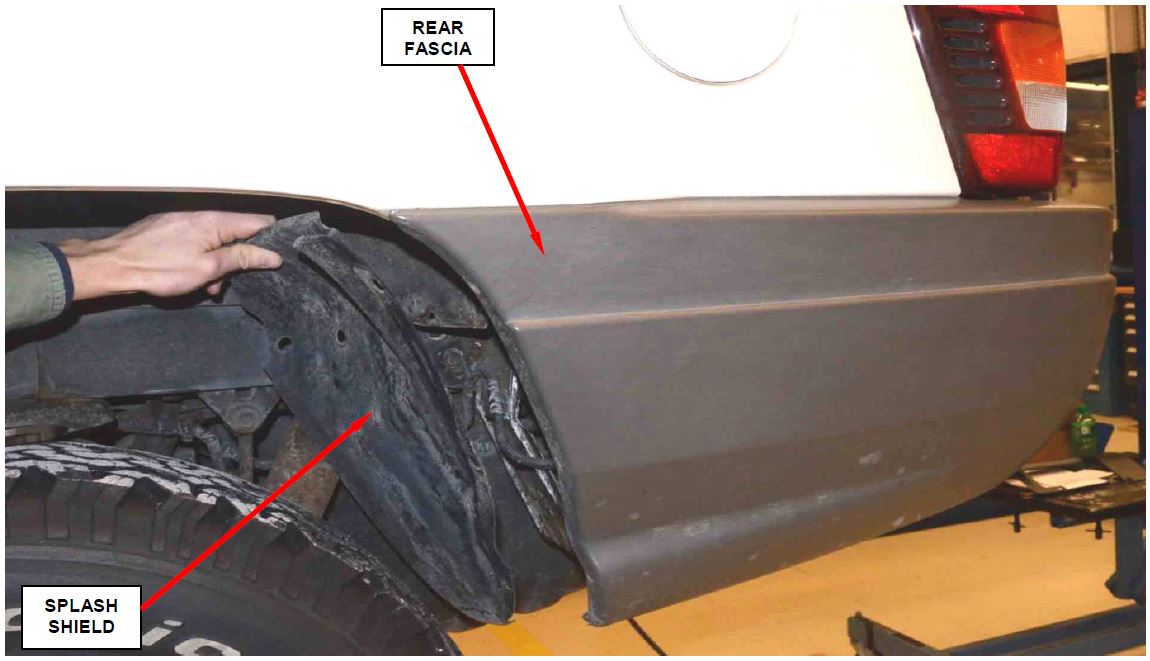
Figure 6 – Right and Left Rear Wheel Opening Splash Shield (left side shown)
- Remove and save the right and left rear wheel opening splash shields (Figure 6).
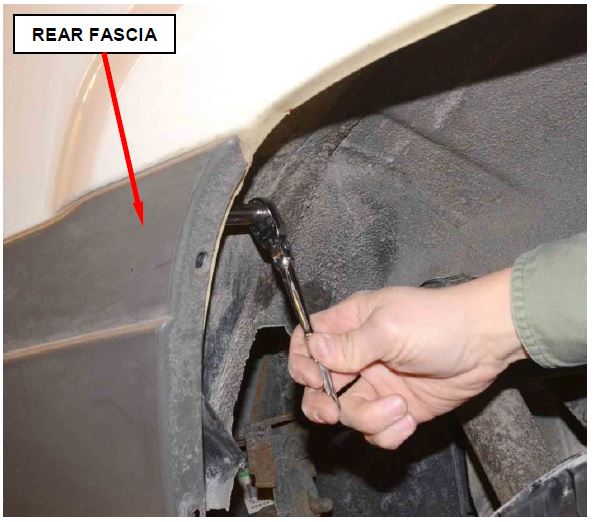
- Remove and save the two fascia retaining nuts inside the right and left wheel opening (Figure 7).
NOTE: The studs may unscrew from the fascia instead of the nut coming off the studs. Should this happen, leave the studs and nuts attached to the vehicle and during fascia installation, screw the studs back into the fascia.
Figure 7 – Two Fascia Retaining Nuts
- Carefully remove all remaining fascia fasteners and remove the fascia from the vehicle.
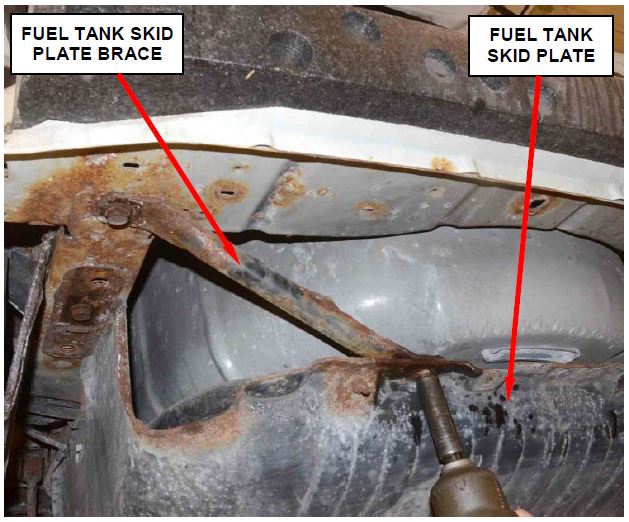
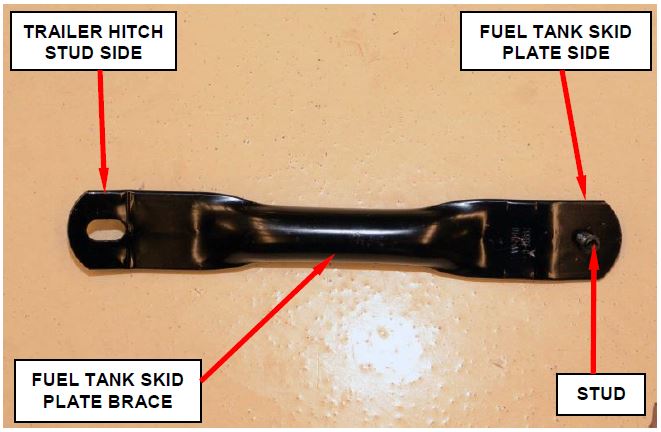
- For vehicles equipped with fuel tank skid plate braces, remove and discard the original braces (Figure 8).
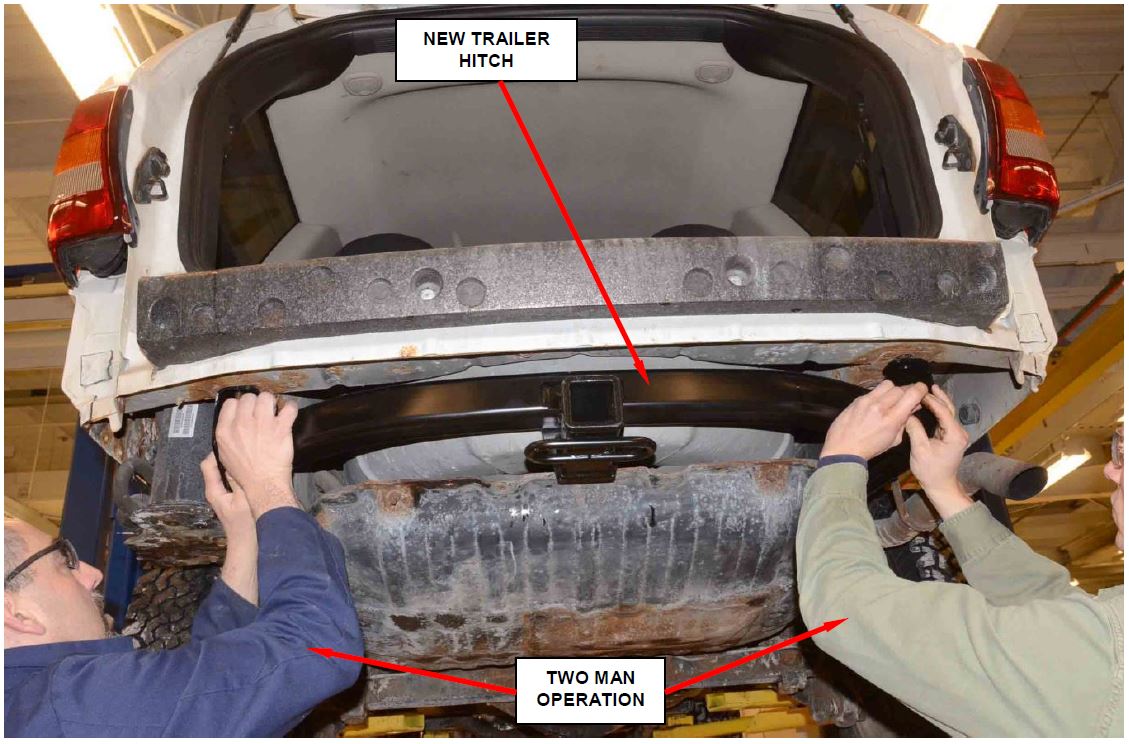
- With the help of an assistant, place the new trailer hitch into position and install the six retaining bolts (Figure 9). Tighten the bolts to 75 ft. lbs. (101 N·m).
Figure 8 – Skid Plate Brace
Figure 9 – With the Help of an Assistant, Install the Trailer Hitch
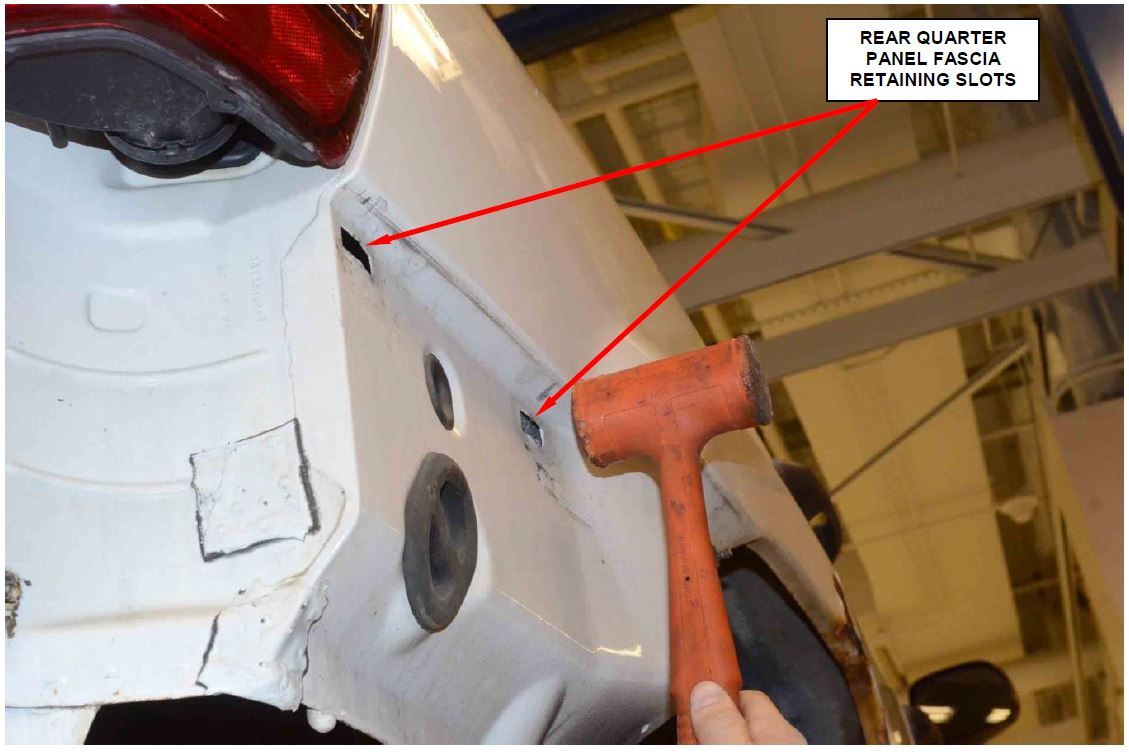
Figure 10 – Flatten Fascia Retaining Body Slots
- Using a rubber hammer, flatten the fascia retaining body slots on right and left rear quarter panels (Figure 10).
CAUTION: The fascia will not fit tight against the quarter panel if the fascia retaining body slots are not flattened out.
- Install new fuel tank skid plate braces (Figure 11).
Figure 11 – Fuel Tank Skid Plate Braces
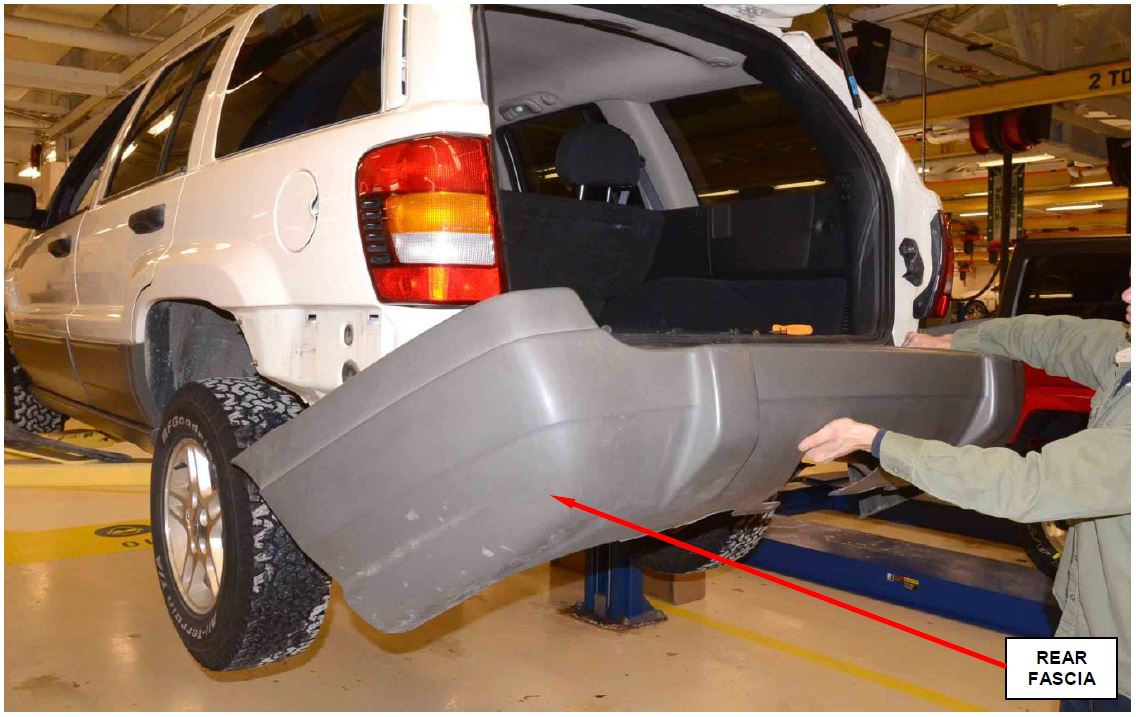
Figure 12 – Rear Fascia
- Install the rear fascia onto the vehicle (Figure 12).
- Remove the rear wheels and tires from the vehicle.
- Install the rear wheel opening splash shields.
- Install the rear wheels and tires.
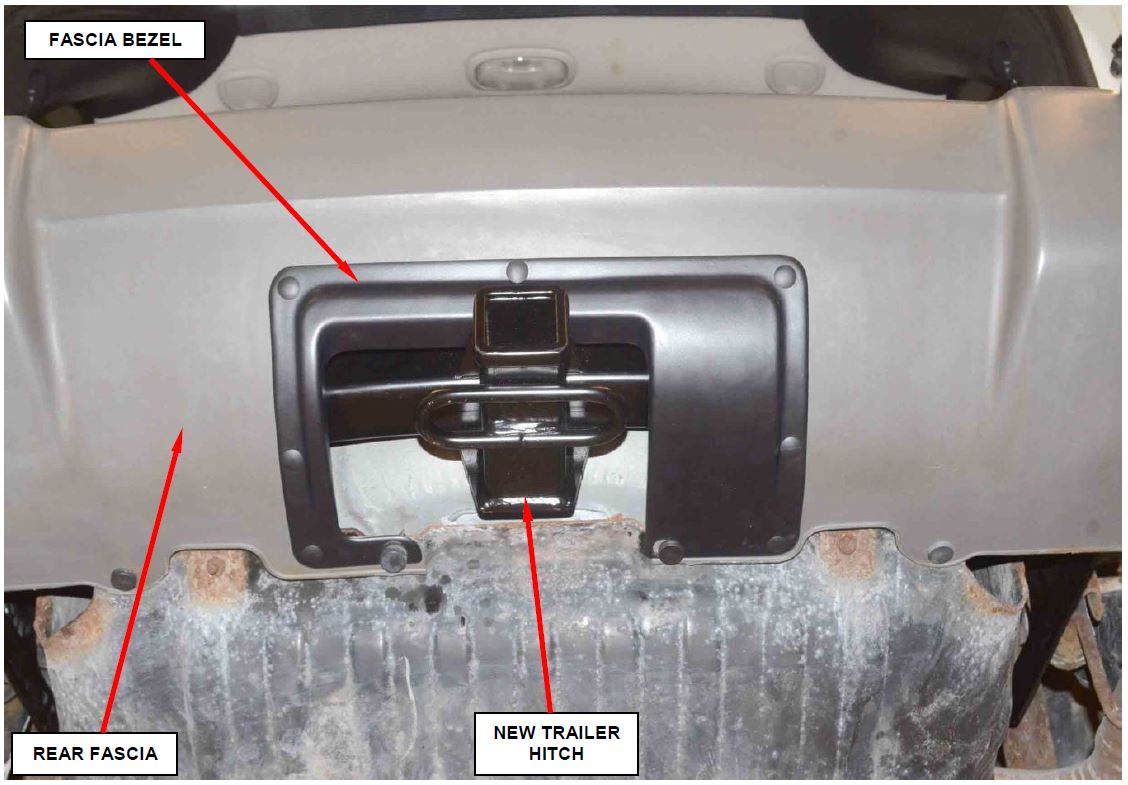
Figure 13 – Correctly Installed Fascia Bezel
- Install the two original outboard rivets at the bottom of the rear fascia (Figure 13).
- Place the trailer hitch fascia opening bezel into position and install the two original lower rivets (Figure 13).
- With the trailer hitch fascia opening bezel in position on the fascia, drill the top center hole using a ¼ inch (6.35 mm) drill bit and install one plastic push pin (Figure 13).
- Drill the remaining holes around the trailer hitch fascia opening bezel and install the plastic push pins (Figure 13).
- For vehicles with trailer hitch wiring, install trailer wiring as required.
- Lower the vehicle from the hoist and return the vehicle to the customer.
Completion Reporting and Reimbursement
Claims for vehicles that have been serviced must be submitted on the DealerCONNECT Claim Entry Screen located on the Service tab. Claims submitted will be used by Chrysler to record Customer Satisfaction Notification service completions and provide dealer payments.
Use one of the following labor operation numbers and time allowances:
| Labor Operation Number | Time Allowance | |
|---|---|---|
| Inspect for a trailer hitch in write up area | 13-N4-71-81 | No Charge |
| Additional trailer hitch inspection by technician | 13-N4-72-81 | 0.2 hours |
| Inspect and replace trailer hitch | 13-N4-71-82 | 1.4 hours |
| Related Operation | ||
| Transfer trailer hitch wiring to new trailer hitch | 13-N4-71-50 | 0.2 hours |
Add the cost of the parts package plus applicable dealer allowance to your claim.
NOTE: See the Warranty Administration Manual, Recall Claim Processing Section, for complete claim processing instructions.
FOR VEHICLES THAT WERE INSPECTED IN THE WRITE UP AREA:
Enter “INSPECT” in the part number section of your claim with a quantity of one (1). Enter $5.00 WITH NO MARK-UP for reimbursement of trailer hitch inspection performed in the write up area.
Dealer Notification
To view this notification on DealerCONNECT, select “Global Recall System” on the Service tab, then click on the description of this notification.
Owner Notification and Service Scheduling
All involved vehicle owners known to Chrysler are being notified of the service requirement by mail. They are requested to schedule appointments for this service with their dealers. A generic copy of the owner letter is attached.
Enclosed with each owner letter is an Owner Notification postcard to allow owners to update our records if applicable.
Vehicle Lists, Global Recall System, VIP and Dealer Follow Up
All involved vehicles have been entered into the DealerCONNECT Global Recall System (GRS) and Vehicle Information Plus (VIP) for dealer inquiry as needed.
GRS provides involved dealers with an updated VIN list of their incomplete vehicles. The owner’s name, address and phone number are listed if known. Completed vehicles are removed from GRS within several days of repair claim submission.
To use this system, click on the “Service” tab and then click on “Global Recall System.” Your dealer’s VIN list for each recall displayed can be sorted by: those vehicles that were unsold at recall launch, those with a phone number, city, zip code, or VIN sequence.
Dealers should perform this repair on all unsold vehicles before retail delivery. Dealers should also use the VIN list to follow up with all owners to schedule appointments for this repair.
VIN lists may contain confidential, restricted owner name and address information that was obtained from the Department of Motor Vehicles of various states. Use of this information is permitted for this notification only and is strictly prohibited from all other use.
Additional Information
If you have any questions or need assistance in completing this action, please contact your Service and Parts District Manager.
Customer Service / Field Operations
FCA US LLC
 Loading...
 Loading...
